
【容器应用系列教程】基于Harbor构建企业级镜像仓库
一、仓库类型
- 公有仓库
DockerHubhttps://hub.docker.com/
- 私有仓库
registryharbor
二、Dockerhub的使用
需要自行去官网注册账号:https://hub.docker.com
1.登录Docker
[root@localhost ~]# docker login
Login with your Docker ID to push and pull images from Docker Hub. If you don't have a Docker ID, head over to https://hub.docker.com to create one.
Username: wangshengjj
Password:
WARNING! Your password will be stored unencrypted in /root/.docker/config.json.
Configure a credential helper to remove this warning. See
https://docs.docker.com/engine/reference/commandline/login/#credentials-store

Login Succeeded
2.上传镜像到Dockerhub
每次
push镜像之前,都需要打标签,仓库地址这取决于您在Dockerhub上注册的用户名
# docker tag 镜像名:tag  仓库地址/镜像名:tag
# docker push 仓库地址/镜像名:tag
[root@localhost ~]# docker tag nginx:1.14 wangshengjj/nginx:1.14
[root@localhost ~]# docker push wangshengjj/nginx:1.14
3.登出
每次上传完镜像,记得退出登录
[root@localhost ~]# docker logout
三、关于Harbor
Harbor是一个Vmware开源的,用于存储和分发Docker镜像的企业级Registry服务器,通过添加一些企业必需的功能特性,例如安全、标识和管理等。
Harbor官网:https://goharbor.io/
1.Harbor的特性
- 基于角色的访问控制
- 镜像复制
- 图形化用户界面
AD/LDAP支持- 审计管理
- 国际化
RESTful API- 部署简单
2.Harbor部署的方式
on-line在线部署off-line离线部署
四、单机部署Harbor
本教程采用离线部署方式,截止教程编写日志,使用最新版本
v2.8.2
关闭防火墙和SElinux、配置时间同步
过程省略
1.添加主机名解析
[root@harbor ~]# vim /etc/hosts
192.168.140.10 harbor.linux.com harbor
2.安装Docker-ce
安装过程省略
请查看Docker安装教程:https://www.wsjj.top/archives/132
3.安装Docker-compose
如果没有
wget命令,请安装yum install -y wget
[root@harbor ~]# wget -O /usr/local/bin/docker-compose https://github.com/docker/compose/releases/download/v2.18.0/docker-compose-linux-x86_64
[root@harbor ~]# chmod a+x /usr/local/bin/docker-compose
[root@harbor ~]# docker-compose -v
Docker Compose version v2.18.0
4.安装Harbor
A.下载Harbor
[root@harbor ~]# wget https://github.com/goharbor/harbor/releases/download/v2.8.2/harbor-offline-installer-v2.8.2.tgz
[root@harbor ~]# tar xf harbor-offline-installer-v2.8.2.tgz -C /usr/local/
[root@harbor ~]# cp /usr/local/harbor/harbor.yml.tmpl /usr/local/harbor/harbor.yml
B.为Harbor配置SSL证书
注意:
Harbor需要V3版SSL证书
配置私有ca
[root@harbor ~]# mkdir -p /opt/ssl
[root@harbor ~]# cd /opt/ssl
[root@harbor ssl]# openssl genrsa -out /opt/ssl/ca.key 4096
[root@harbor ssl]# openssl req -x509 -new -nodes -sha512 -days 3650  -subj "/CN=harbor.linux.com"  -key /opt/ssl/ca.key  -out /opt/ssl/ca.crt
为Harbor颁发证书
[root@harbor ssl]# openssl genrsa -out /opt/ssl/server.key 4096
[root@harbor ssl]# openssl req  -new -sha512  -subj "/CN=harbor.linux.com"  -key /opt/ssl/server.key  -out /opt/ssl/server.csr
准备v3.ext文件(重要)
[root@harbor ssl]# vim /opt/ssl/v3.ext
authorityKeyIdentifier=keyid,issuer
basicConstraints=CA:FALSE
keyUsage = digitalSignature, nonRepudiation, keyEncipherment, dataEncipherment
extendedKeyUsage = serverAuth
subjectAltName = @alt_names
[alt_names]
DNS.1=harbor.linux.com
颁发自签证书
[root@harbor ssl]# openssl x509 -req -sha512 -days 3650 -extfile /opt/ssl/v3.ext A /opt/ssl/ca.crt -CAkey /opt/ssl/ca.key -CAcreateserial -in /opt/ssl/server.csr ut /opt/ssl/server.crt
C.编辑Harbor配置文件
[root@harbor ~]# vim /usr/local/harbor/harbor.yml
hostname: harbor.linux.com	#指定域名,和刚才自签的域名保持一致
http:
  # port for http, default is 80. If https enabled, this port will redirect to https port
  port: 80

# https related config
https:
  # https port for harbor, default is 443
  port: 443
  # The path of cert and key files for nginx
  certificate: /opt/ssl/server.crt	#指定SSL证书路径
  private_key: /opt/ssl/server.key	#指定SSL秘钥路径
D.启动Harbor
生成必要的配置文件
[root@harbor ~]# bash /usr/local/harbor/prepare

prepare base dir is set to /usr/local/harbor
Generated configuration file: /config/portal/nginx.conf
Generated configuration file: /config/log/logrotate.conf
Generated configuration file: /config/log/rsyslog_docker.conf
Generated configuration file: /config/nginx/nginx.conf
Generated configuration file: /config/core/env
Generated configuration file: /config/core/app.conf
Generated configuration file: /config/registry/config.yml
Generated configuration file: /config/registryctl/env
Generated configuration file: /config/registryctl/config.yml
Generated configuration file: /config/db/env
Generated configuration file: /config/jobservice/env
Generated configuration file: /config/jobservice/config.yml
Generated and saved secret to file: /data/secret/keys/secretkey
Successfully called func: create_root_cert
Generated configuration file: /compose_location/docker-compose.yml
Clean up the input dir
安装Harbor
[root@harbor ~]# bash /usr/local/harbor/install.sh

[+] Building 0.0s (0/0)
[+] Running 10/10
 ✔ Network harbor_harbor        Created                                     0.0s
 ✔ Container harbor-log         Started                                     0.3s
 ✔ Container registryctl        Started                                     0.7s
 ✔ Container harbor-db          Started                                     1.0s
 ✔ Container registry           Started                                     1.0s
 ✔ Container harbor-portal      Started                                     0.9s
 ✔ Container redis              Started                                     0.9s
 ✔ Container harbor-core        Started                                     1.2s
 ✔ Container harbor-jobservice  Started                                     1.7s
 ✔ Container nginx              Started                                     1.7s
✔ ----Harbor has been installed and started successfully.----
[root@harbor ~]# docker images
REPOSITORY                      TAG       IMAGE ID       CREATED      SIZE
goharbor/harbor-exporter        v2.8.2    63341a78f287   4 days ago   98.1MB
goharbor/redis-photon           v2.8.2    6f4498a430ca   4 days ago   121MB
goharbor/trivy-adapter-photon   v2.8.2    06de9f1c733d   4 days ago   460MB
goharbor/notary-server-photon   v2.8.2    ef7c8ea2dc49   4 days ago   114MB
goharbor/notary-signer-photon   v2.8.2    4e5b1746a124   4 days ago   111MB
goharbor/harbor-registryctl     v2.8.2    fa61a236a6d6   4 days ago   142MB
goharbor/registry-photon        v2.8.2    f80e71363231   4 days ago   79.3MB
goharbor/nginx-photon           v2.8.2    3d009028f260   4 days ago   120MB
goharbor/harbor-log             v2.8.2    2914d282d9bf   4 days ago   127MB
goharbor/harbor-jobservice      v2.8.2    40118f1568a8   4 days ago   141MB
goharbor/harbor-core            v2.8.2    0bbbd1f379fc   4 days ago   165MB
goharbor/harbor-portal          v2.8.2    3e74e0758aa4   4 days ago   127MB
goharbor/harbor-db              v2.8.2    5126635ae9f0   4 days ago   174MB
goharbor/prepare                v2.8.2    eb3cf3cdd17a   4 days ago   163MB
[root@harbor ~]# docker ps

CONTAINER ID   IMAGE                                COMMAND                   CREATED              STATUS                        PORTS                                                                            NAMES
1e00e179acd2   goharbor/harbor-jobservice:v2.8.2    "/harbor/entrypoint.…"   About a minute ago   Up 55 seconds (healthy)                                                                                        harbor-jobservice
d5fffbe5823d   goharbor/nginx-photon:v2.8.2         "nginx -g 'daemon of…"   About a minute ago   Up 58 seconds (healthy)       0.0.0.0:80->8080/tcp, :::80->8080/tcp, 0.0.0.0:443->8443/tcp, :::443->8443/tcp   nginx
f1dbfee71407   goharbor/harbor-core:v2.8.2          "/harbor/entrypoint.…"   About a minute ago   Up 59 seconds (healthy)                                                                                        harbor-core
36aff7d14ee1   goharbor/harbor-portal:v2.8.2        "nginx -g 'daemon of…"   About a minute ago   Up 59 seconds (healthy)                                                                                        harbor-portal
87db46acedac   goharbor/registry-photon:v2.8.2      "/home/harbor/entryp…"   About a minute ago   Up 59 seconds (healthy)                                                                                        registry
b42157ee30e2   goharbor/harbor-registryctl:v2.8.2   "/home/harbor/start.…"   About a minute ago   Up 59 seconds (healthy)                                                                                        registryctl
6c57d8b4f315   goharbor/harbor-db:v2.8.2            "/docker-entrypoint.…"   About a minute ago   Up 59 seconds (healthy)                                                                                        harbor-db
aeb76f6a1ecd   goharbor/redis-photon:v2.8.2         "redis-server /etc/r…"   About a minute ago   Up 59 seconds (healthy)                                                                                        redis
7a3d7f5a487d   goharbor/harbor-log:v2.8.2           "/bin/sh -c /usr/loc…"   About a minute ago   Up About a minute (healthy)   127.0.0.1:1514->10514/tcp                                                        harbor-log
5.Windows配置hosts域名解析
修改文件:
C:\Windows\System32\drivers\etc\hosts

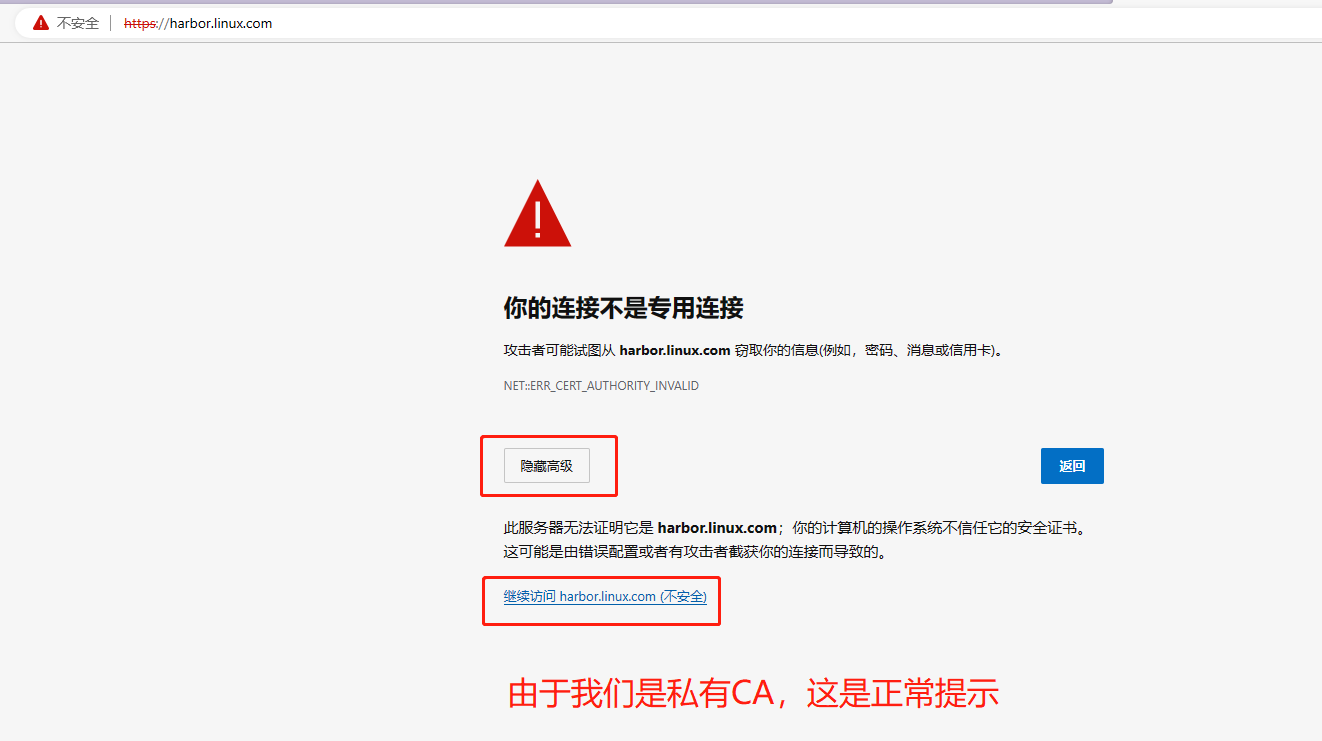
6.登录测试

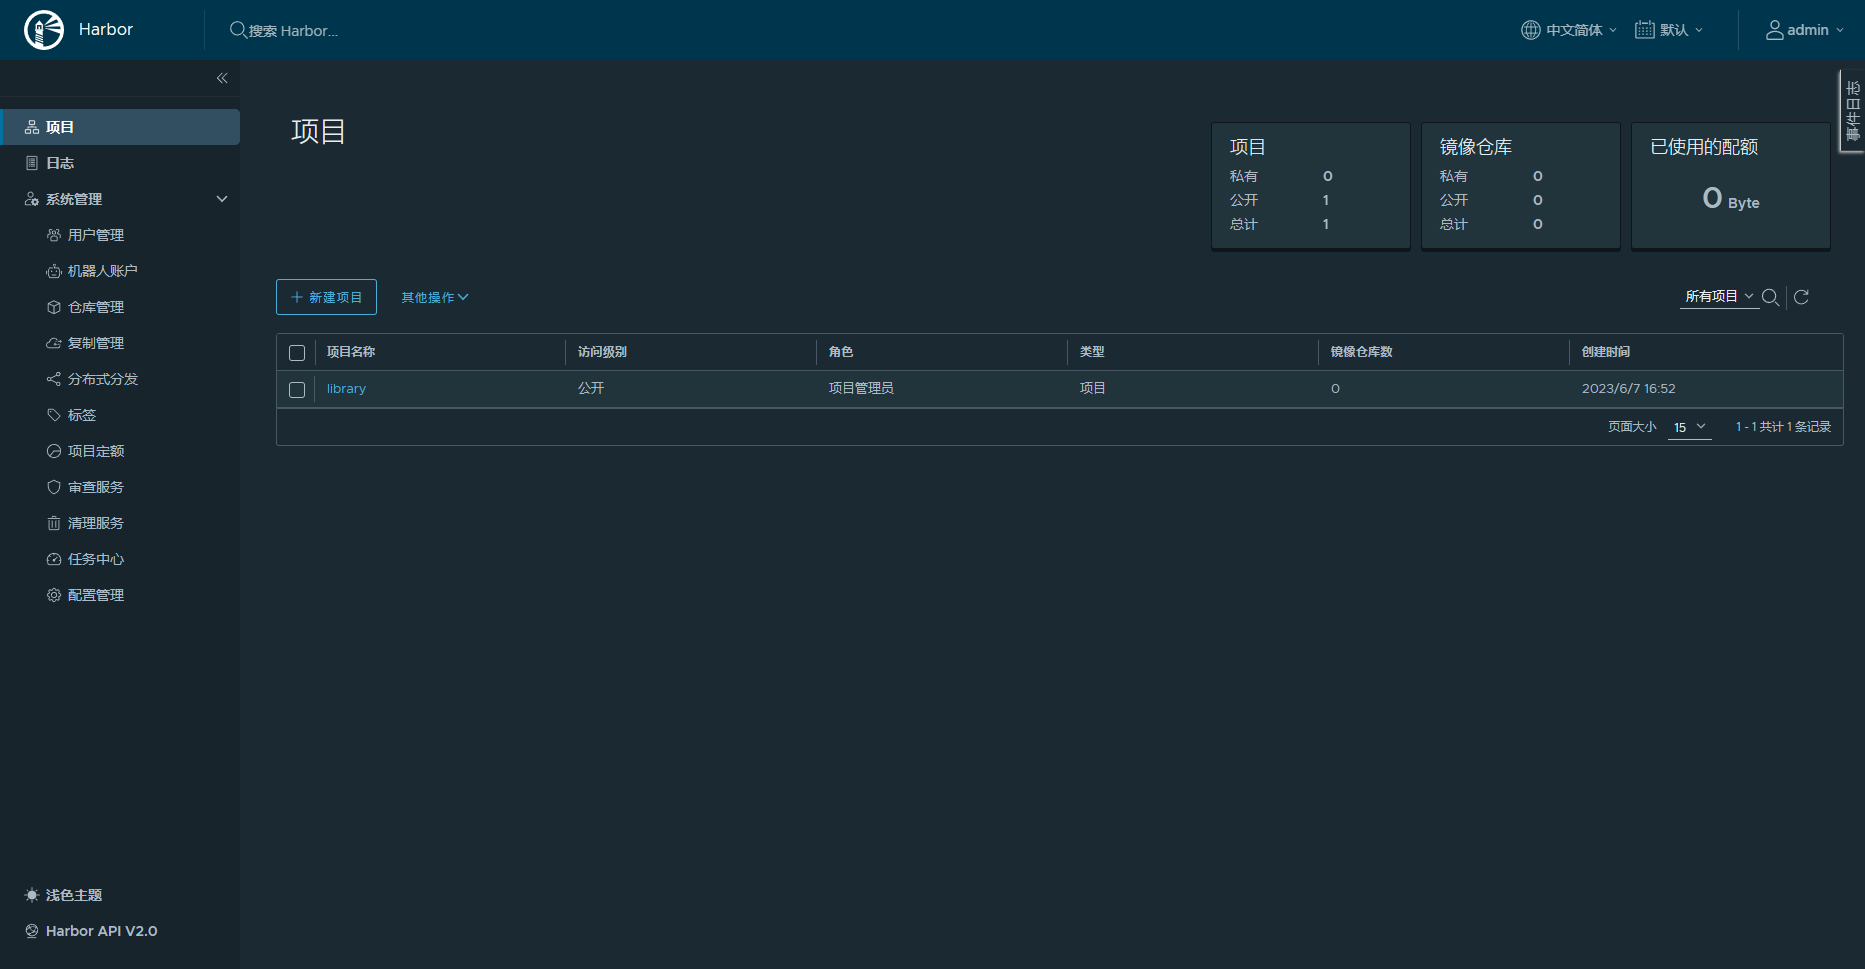
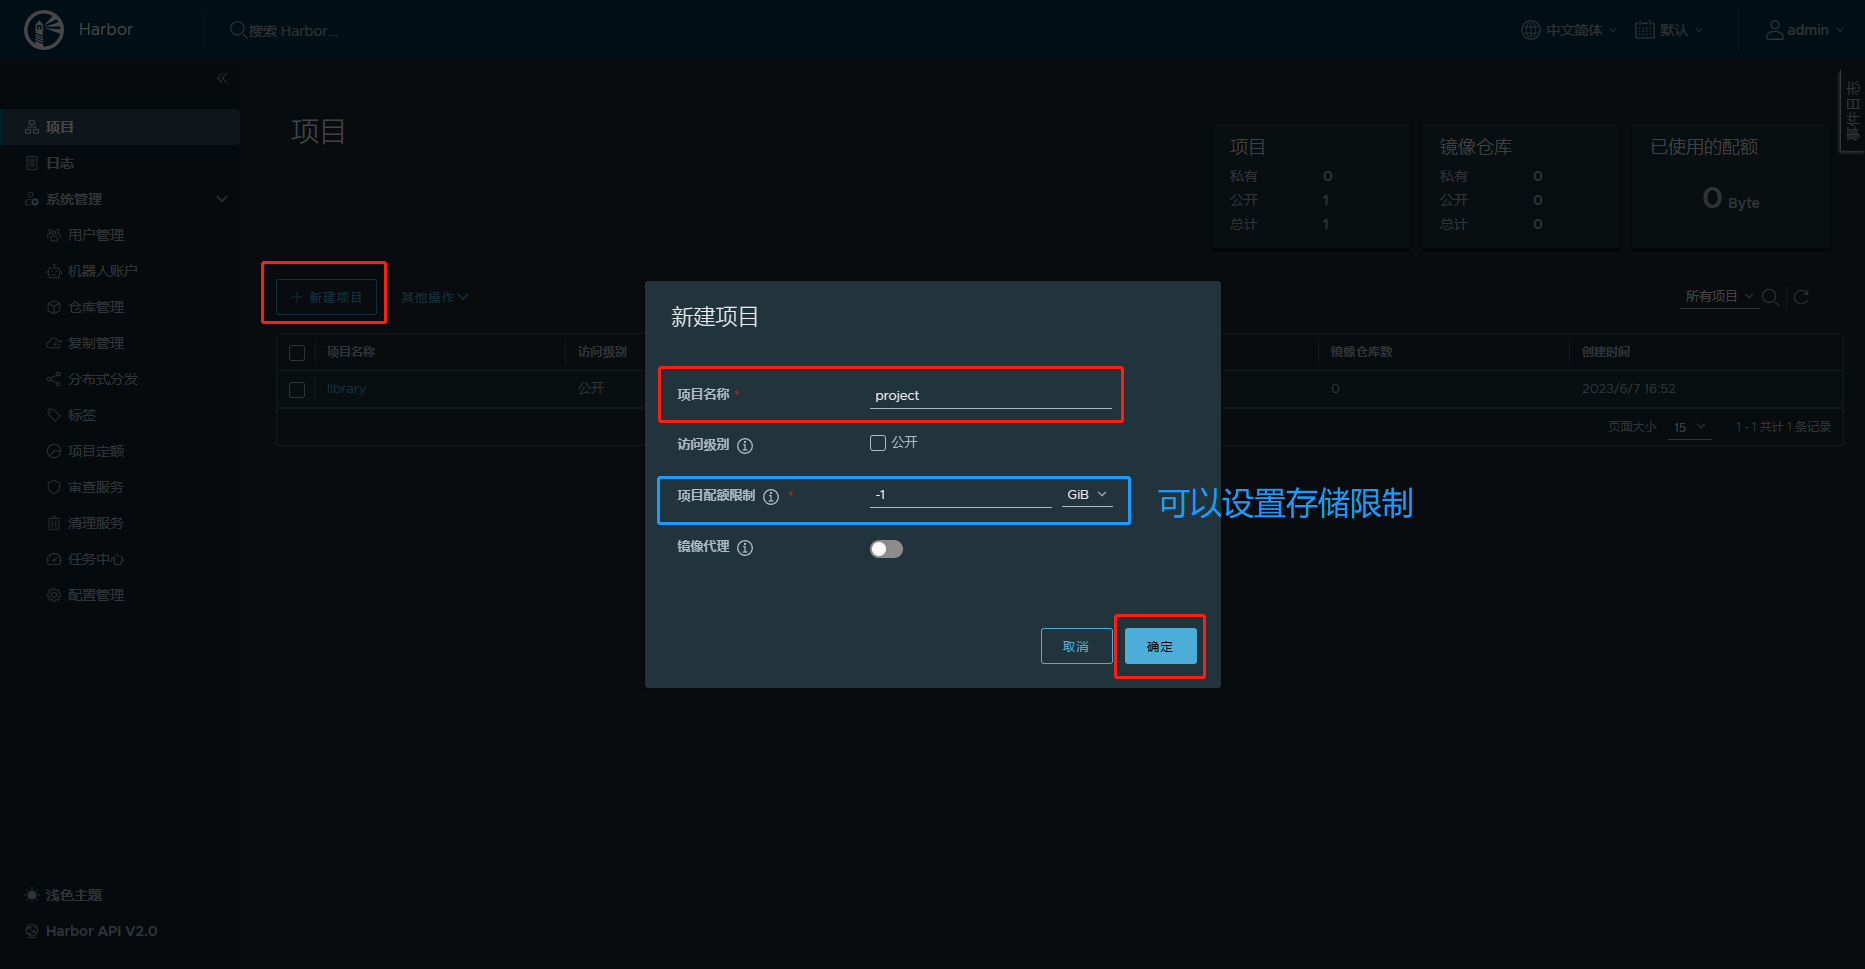
7.创建测试项目
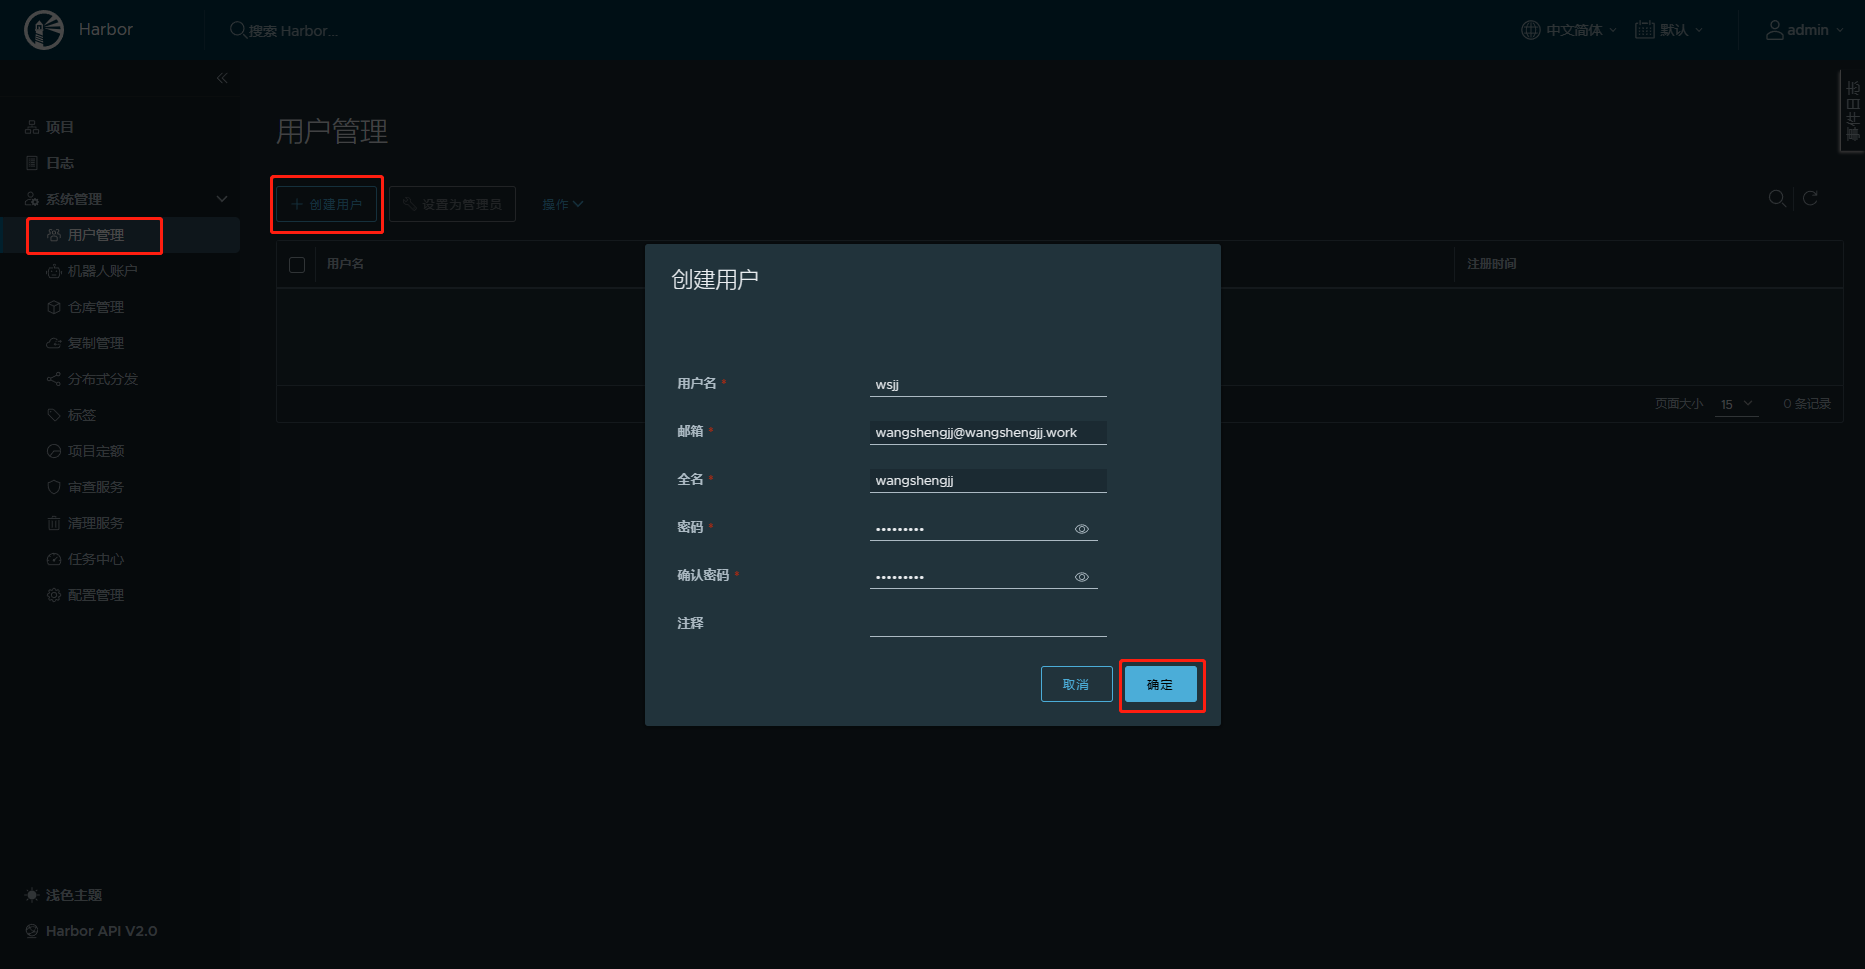
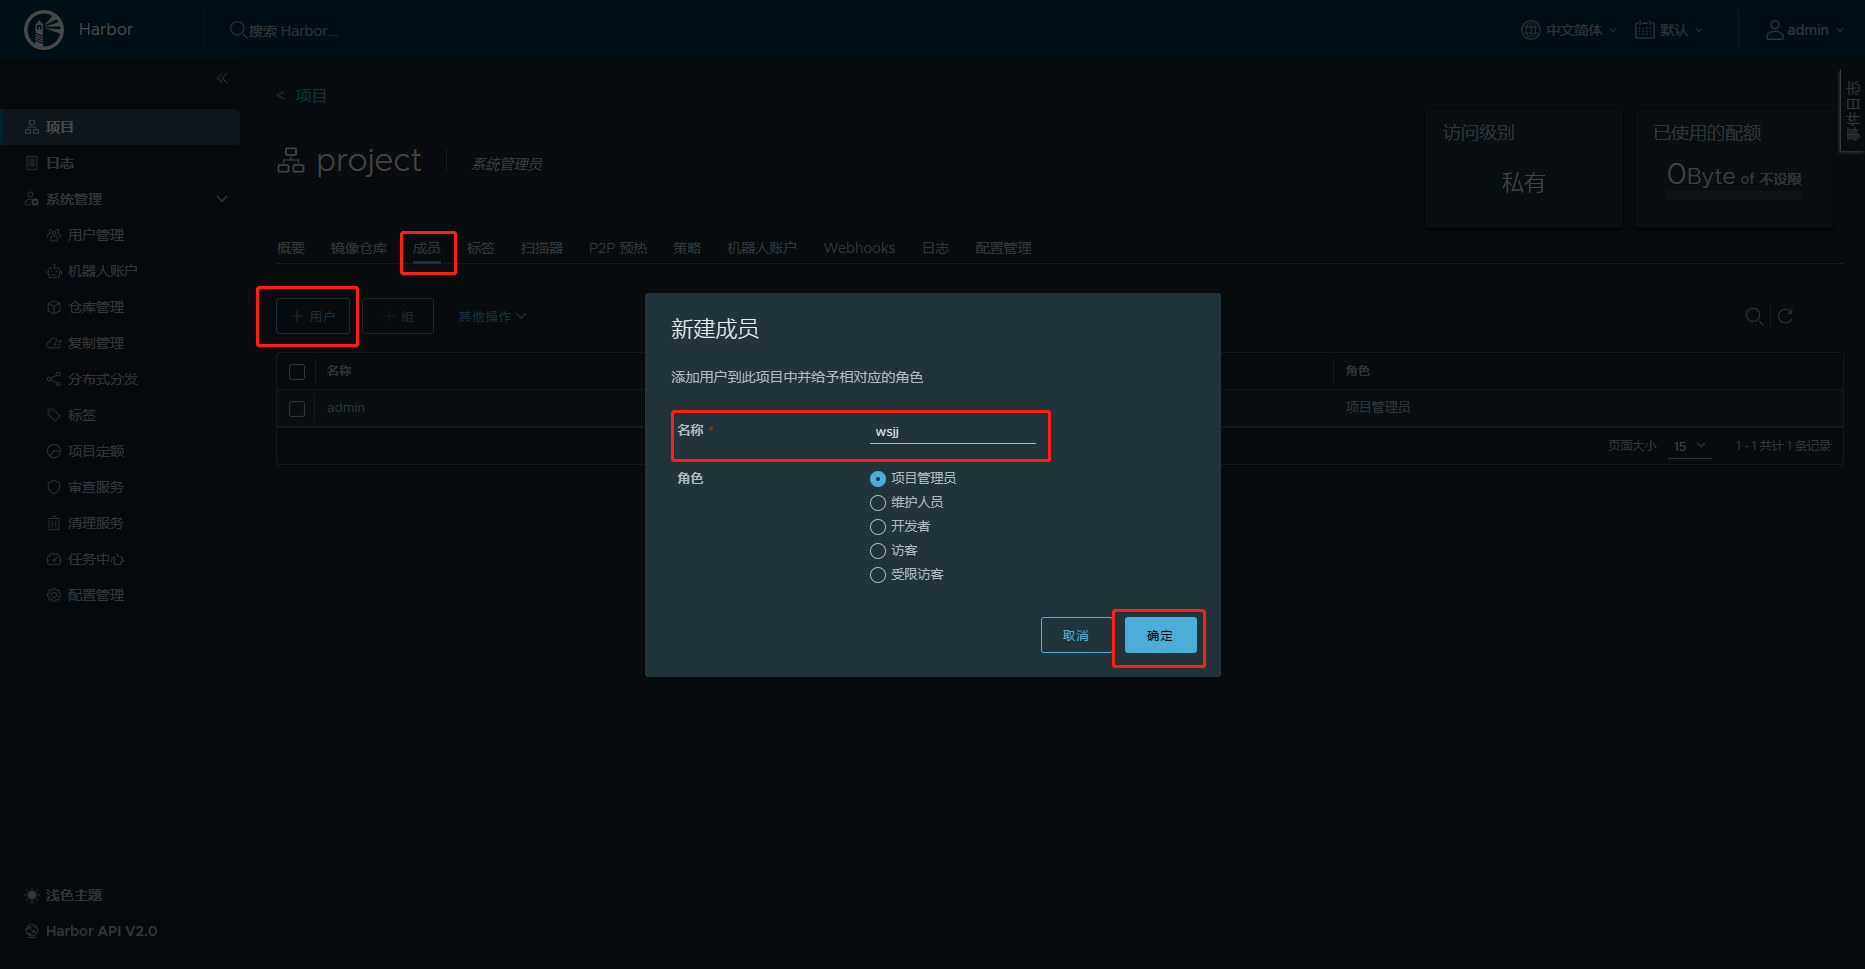
8.创建用户,并授权项目
9.上传镜像
由于我们启用了https访问,并且是未经互联网认证的私有CA,需要手动拷贝证书给docker
这一步一定要做,否则
Docker登录失败
[root@harbor ~]# mkdir -p /etc/docker/certs.d/harbor.linux.com
[root@harbor ~]# cp /opt/ssl/server.crt /etc/docker/certs.d/harbor.linux.com/
登录私有仓库
[root@harbor ~]# docker login harbor.linux.com
Username: wsjj
Password:
WARNING! Your password will be stored unencrypted in /root/.docker/config.json.
Configure a credential helper to remove this warning. See
https://docs.docker.com/engine/reference/commandline/login/#credentials-store

Login Succeeded
上传测试镜像
[root@harbor ~]# docker tag centos:7 harbor.linux.com/project/centos:v1
[root@harbor ~]# docker push harbor.linux.com/project/centos:v1
The push refers to repository [harbor.linux.com/project/centos]
174f56854903: Pushed
v1: digest: sha256:dead07b4d8ed7e29e98de0f4504d87e8880d4347859d839686a31da35a3b532f size: 529
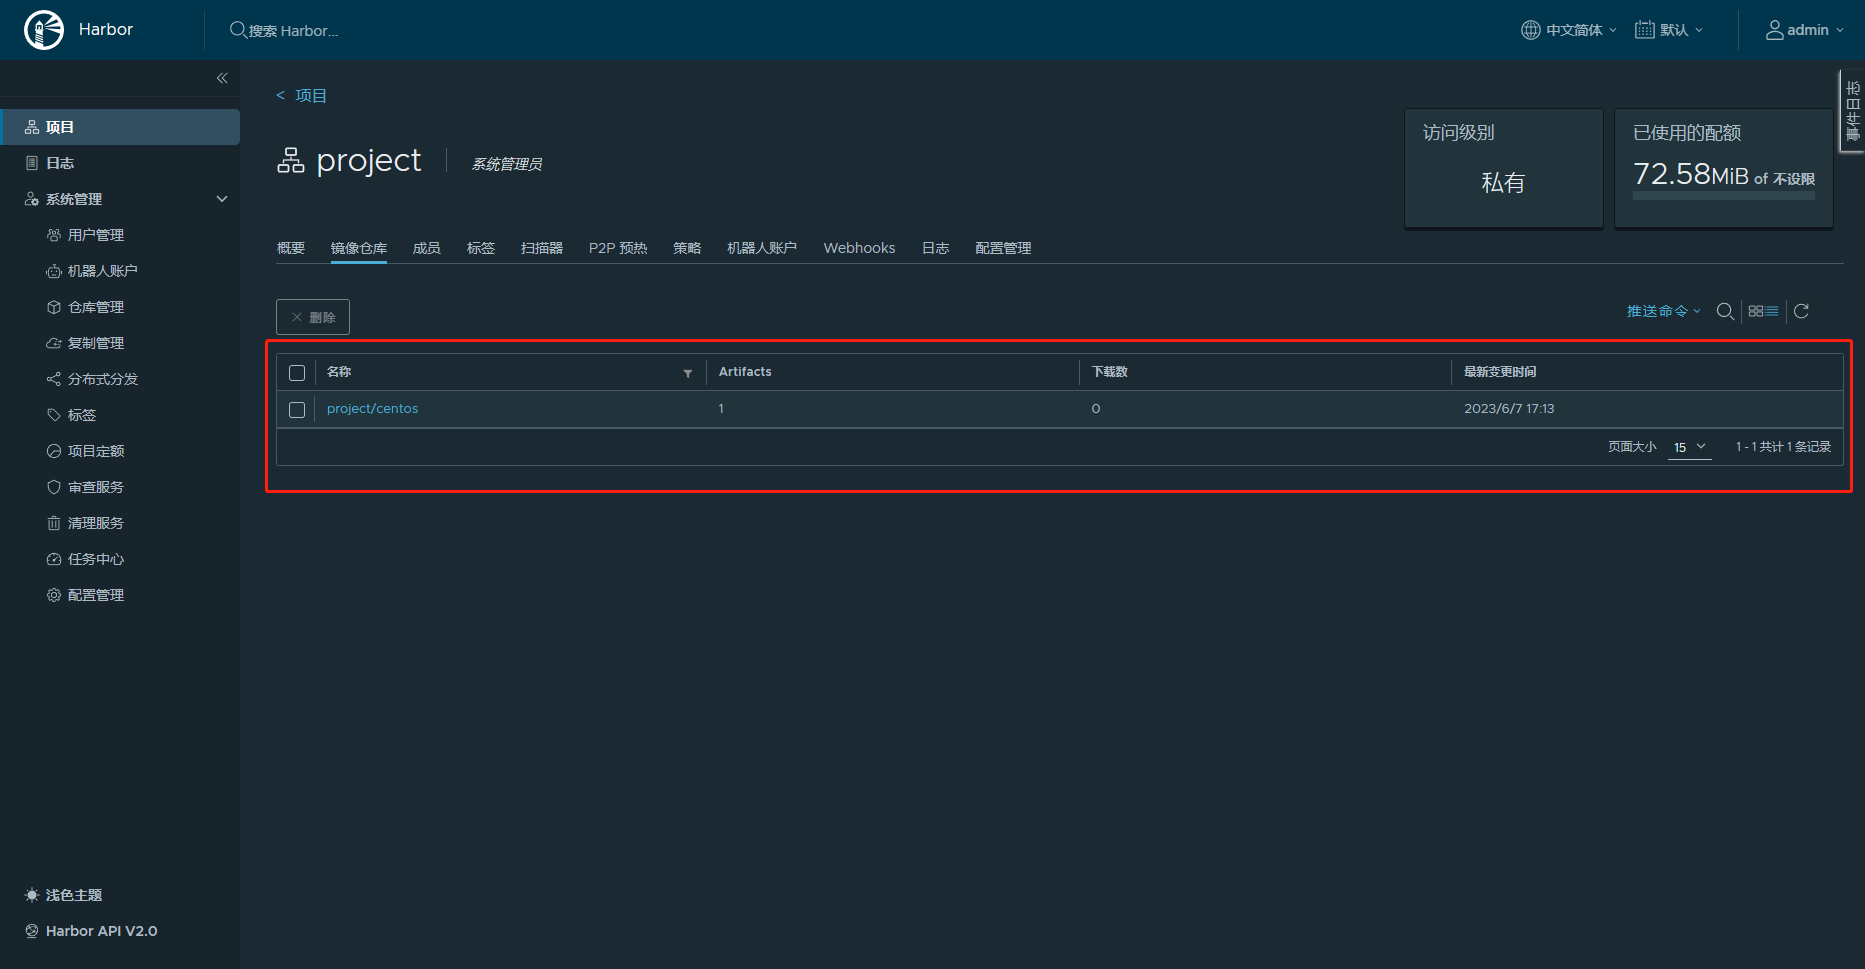
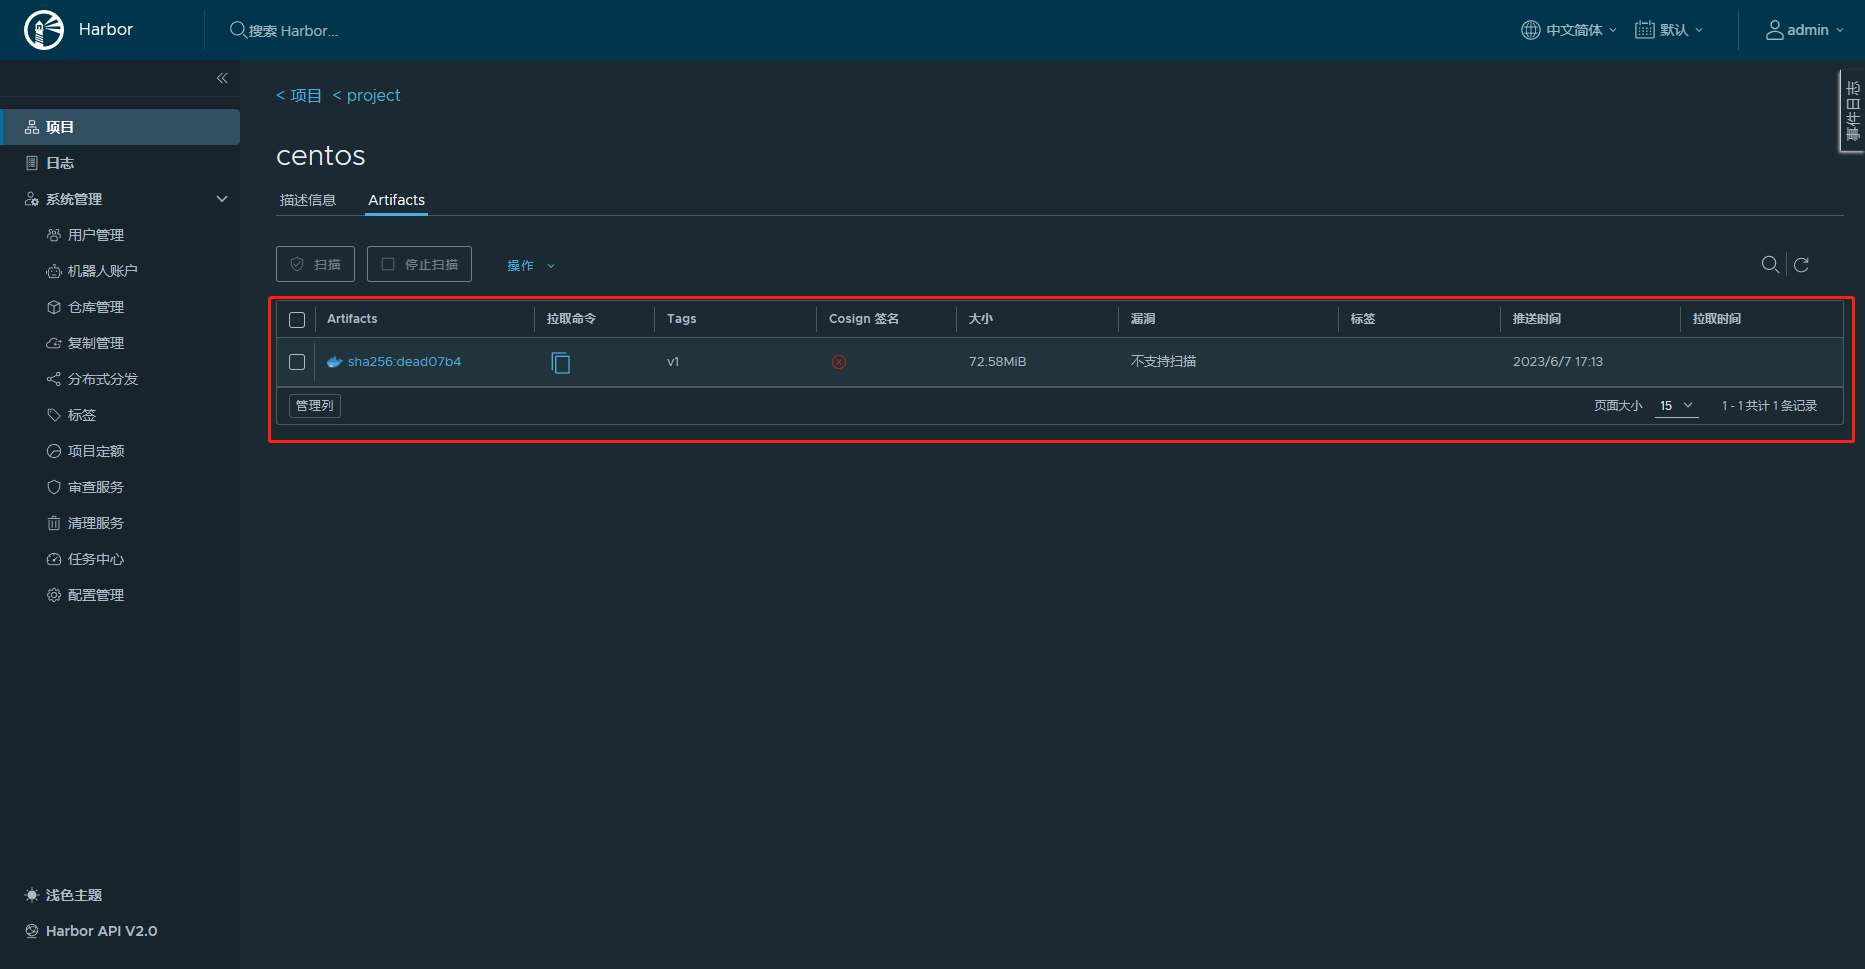
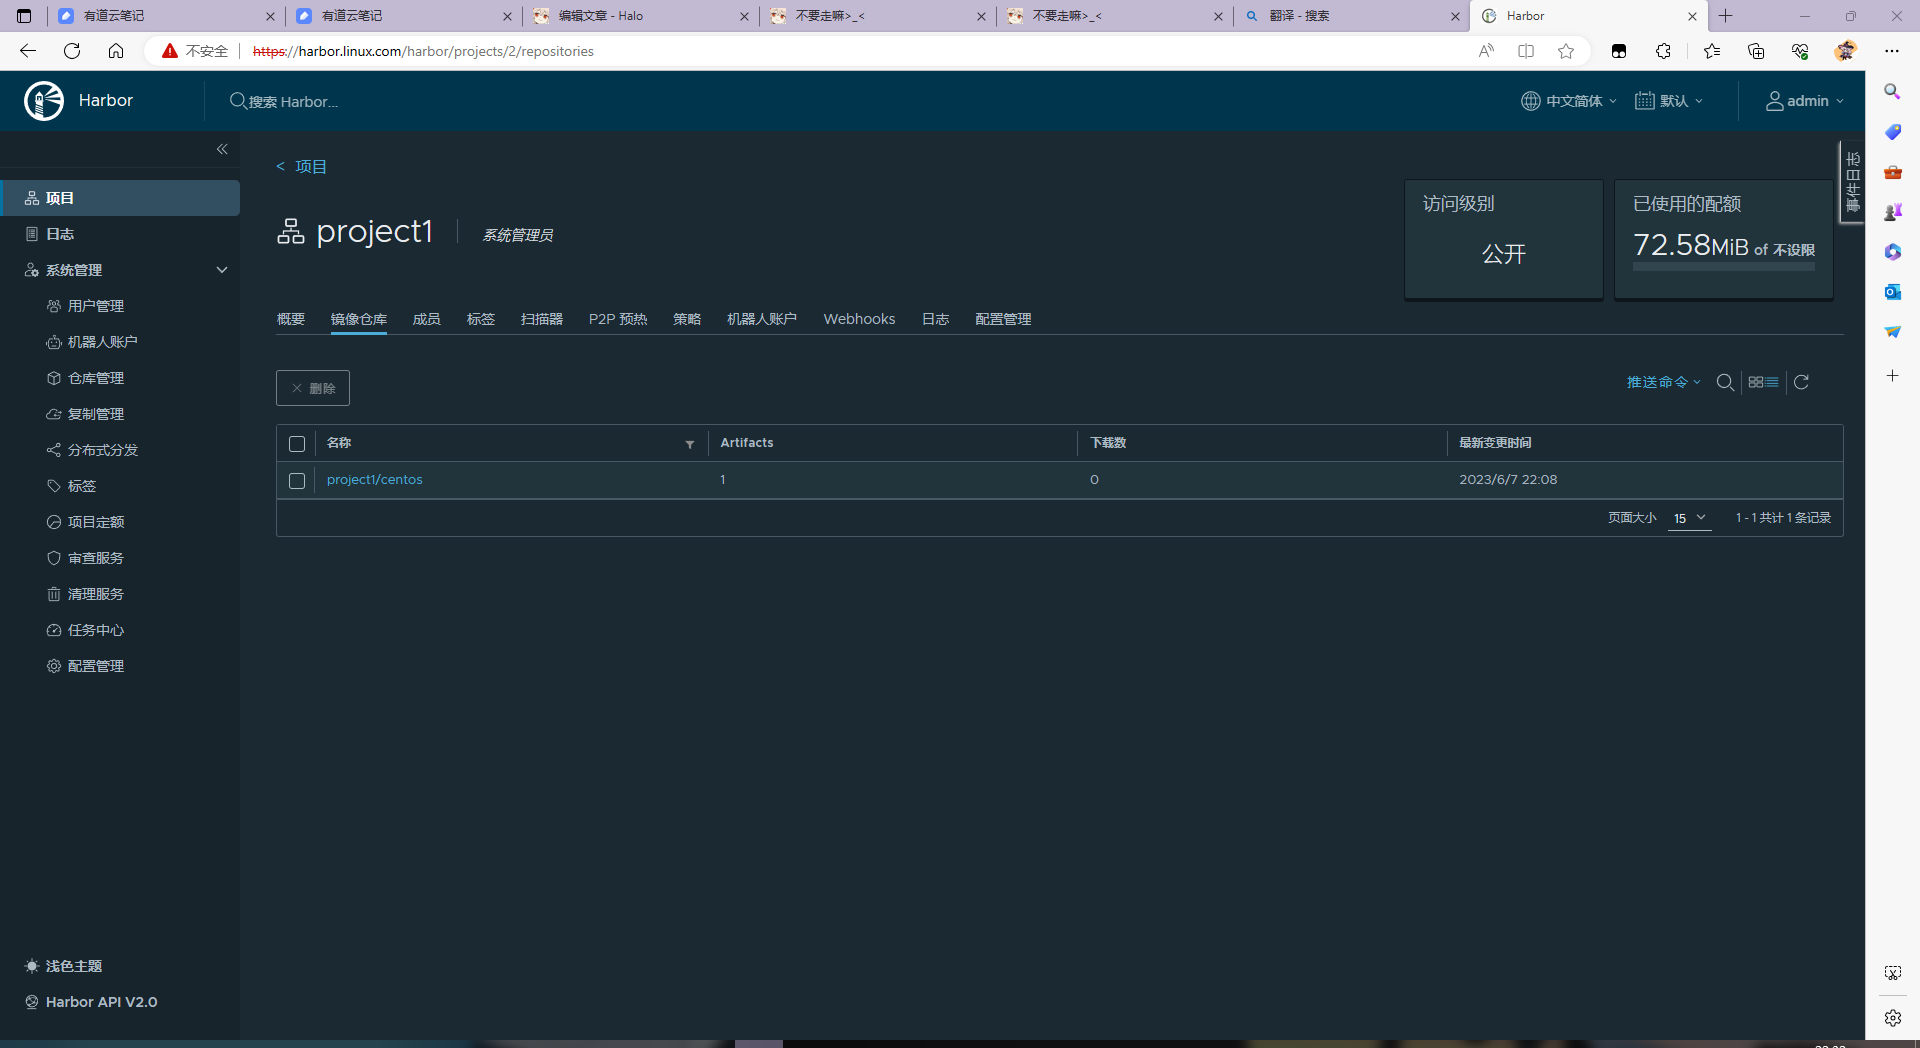
查看web端项目仓库
上传完镜像别忘了退出登录
[root@harbor ~]# docker logout harbor.linux.com
Removing login credentials for harbor.linux.com
10.Harbor组件

redis- 负责存储会话信息
harbor-db- 负责存储仓库数据(项目名称、镜像名称)
registry- 镜像的上传、下载
Log collector- 记录日志
harbor-core- 提供
web UI界面 - 颁发令牌
token webhook- 负责搜集镜像变化的信息,通知给
UI进行展示
- 负责搜集镜像变化的信息,通知给
- 提供
proxy- 提供反向代理
Job service- 提供镜像复制功能
五、Harbor高可用集群部署
1.Harbor高可用进群介绍
- 利用
Harbor自带的复制功能- 两个
harbor节点在进行镜像复制时,如果其中一个节点故障, 此时有新镜像的话,并不会复制到故障节点,而且故障的harbor修复后也不会自动复制数据,会导致数据不一致问题
- 两个
- 基于共享存储的方式实现
- 将数据库(postgreSQL)、
redis独立出来harbor 1.6版本后,数据库仅支持postgreSQL
- 利用共享存储
nfs、ipsan、glusterfs存储镜像
- 将数据库(postgreSQL)、
2.部署Harbor集群
A.环境准备
| 主机名 | IP地址 | 软件 |
|---|---|---|
| node1.linux.com | 192.168.140.10 | Docker、Harbor、NFS、keepalived |
| node2.linux.com | 192.168.140.11 | Docker、Harbor、NFS、keepalived |
| node3.linux.com | 192.168.140.12 | NFS、postgreSQL、Redis |
B.所有主机关闭防火墙和SElinux、配置时间同步
过程省略
C.配置NFS服务器
[root@node3 ~]# mkdir /data
[root@node3 ~]# chmod a+w /data
[root@node3 ~]# yum install -y nfs-utils rpcbind
[root@node3 ~]# vim /etc/exports
/data   192.168.140.10(rw,no_root_squash)       192.168.140.11(rw,no_root_squash)

[root@node3 ~]# systemctl enable --now nfs-server
[root@node3 ~]# showmount -e localhost
Export list for localhost:
/data 192.168.140.11,192.168.140.10
给node1和node2挂载NFS
[root@node1 ~]# yum install -y nfs-utils
[root@node2 ~]# yum install -y nfs-utils
[root@node1 ~]# mkdir /data
[root@node2 ~]# mkdir /data
[root@node1 ~]# vim /etc/fstab
192.168.140.12:/data	/data	nfs	defaults	0 0
[root@node2 ~]# vim /etc/fstab
192.168.140.12:/data	/data	nfs	defaults	0 0
[root@node1 ~]# mount -a
[root@node2 ~]# mount -a
D.回到node3部署redis
配置epel源
[root@node3 ~]# wget -O /etc/yum.repos.d/epel.repo https://mirrors.aliyun.com/repo/epel-7.repo
安装redis
[root@node3 ~]# yum install -y redis
修改redis配置文件
[root@node3 ~]# vim /etc/redis.conf
bind 192.168.140.12	#指定监听地址
daemonize yes	#开启后台运行
启动redis
[root@node3 ~]# systemctl enable --now redis
[root@node3 ~]# netstat -tunlp | grep redis
tcp        0      0 192.168.140.12:6379     0.0.0.0:*               LISTEN      13102/redis-server
E.安装postgreSQL
下载postgreSQL安装包
[root@node3 ~]# wget --no-check-certificate https://ftp.postgresql.org/pub/source/v12.2/postgresql-12.2.tar.gz
安装必要的依赖
[root@node3 ~]# yum install -y cmake gcc gcc-c++ perl readline readline-devel openssl openssl-devel zlib zlib-devel ncurses-devel readline readline-devel zlib zlib-devel
安装postgreSQL
[root@node3 ~]# tar xf postgresql-12.2.tar.gz
[root@node3 ~]# cd postgresql-12.2/
[root@node3 postgresql-12.2]# ./configure --prefix=/usr/local/postsql
[root@node3 postgresql-12.2]# make && make install
初始化postgreSQL
启动
postgreSQL需要普通用户
[root@node3 ~]# useradd postgres
[root@node3 ~]# mkdir -p /work/harbor-db/{data,temp,log}
[root@node3 ~]# chown -R postgres.postgres /work/harbor-db/
[root@node3 ~]# su - postgres
[postgres@node3 ~]$ /usr/local/postsql/bin/initdb --username=postgres -D /work/harbor-db/data/
修改postgreSQL配置文件
[postgres@node3 ~]$ vim /work/harbor-db/data/postgresql.conf
#配置文件并不完整,仅展示修改部分
data_directory = '/work/harbor-db/data'         # use data in another directory
                                        # (change requires restart)
hba_file = '/work/harbor-db/data/pg_hba.conf'   # host-based authentication file
                                        # (change requires restart)
ident_file = '/work/harbor-db/data/pg_ident.conf'
listen_addresses = '*'
port = 5432
unix_socket_directories = '/work/harbor-db/temp'
timezone = 'Asia/Shanghai'
logging_collector = on	#启用日志功能
log_rotation_size = 1GB	#启动日志重写功能,超过1GB,创建新的日志文件
log_timezone = 'Asia/Shanghai'
log_min_duration_statement = 100
设置允许连接的远程客户端
[postgres@node3 ~]$ vim /work/harbor-db/data/pg_hba.conf
#把以下内容加到文件末尾
host    all             harbor          192.168.140.10/24                 trust
host    all             harbor          192.168.140.11/24                 trust
启动postgreSQL数据库
[postgres@node3 ~]$ /usr/local/postsql/bin/pg_ctl -D /work/harbor-db/data/ -l /work/harbor-db/log/start.log start

[postgres@node3 ~]$ netstat -tunlp | grep postgres
(Not all processes could be identified, non-owned process info
 will not be shown, you would have to be root to see it all.)
tcp        0      0 0.0.0.0:5432            0.0.0.0:*               LISTEN      22578/postgres
tcp6       0      0 :::5432                 :::*                    LISTEN      22578/postgres
创建Harbor用到的用户和库
[postgres@node3 ~]$ /usr/local/postsql/bin/psql -h 127.0.0.1 -p 5432 -U postgres	#登录数据库
psql (12.2)		#postgres用户是数据库的管理员用户

#修改管理员密码
postgres=# \password postgres
Enter new password: WWW.1.com
Enter it again:	WWW.1.com

#创建Harbor用到的用户
postgres=# create user harbor with password 'WWW.1.com';
CREATE ROLE

#创建Harbor用到的库
postgres=# create database harbor;
CREATE DATABASE
postgres=# create database harbor_clair;
CREATE DATABASE
postgres=# create database harbor_notary_server;
CREATE DATABASE
postgres=# create database harbor_notary_signer;
CREATE DATABASE

#授权harbor用户对这些库有操作权限
postgres=# grant all on database harbor to harbor;
GRANT
postgres=# grant all on database harbor_clair to harbor;
GRANT
postgres=# grant all on database harbor_notary_server to harbor;
GRANT
postgres=# grant all on database harbor_notary_signer to harbor;
GRANT

#退出数据库
postgres=# \q
node1、node2主机连接数据库测试
[root@node1 ~]# yum install -y postgresql
[root@node2 ~]# yum install -y postgresql
[root@node1 ~]# psql -h 192.168.140.12 -p 5432 -U harbor -W
用户 harbor 的口令:WWW.1.com
harbor=>
harbor=> \q
[root@node2 ~]# psql -h 192.168.140.12 -p 5432 -U harbor -W
用户 harbor 的口令:WWW.1.com
harbor=>
harbor=> \q
F.给node1和node2安装Harbor
node1和node2安装Docker-ce
安装过程省略
关于Docker的安装教程:https://www.wsjj.top/archives/132
安装Docker-compose
[root@node1 ~]# wget -O /usr/local/bin/docker-compose https://github.com/docker/compose/releases/download/v2.18.0/docker-compose-linux-x86_64
[root@node1 ~]# chmod a+x /usr/local/bin/docker-compose
[root@node2 ~]# wget -O /usr/local/bin/docker-compose https://github.com/docker/compose/releases/download/v2.18.0/docker-compose-linux-x86_64
[root@node2 ~]# chmod a+x /usr/local/bin/docker-compose
下载并且安装Harbor
[root@node2 ~]# wget https://github.com/goharbor/harbor/releases/download/v2.8.2/harbor-offline-installer-v2.8.2.tgz
[root@node2 ~]# tar xf harbor-offline-installer-v2.8.2.tgz -C /usr/local/
[root@node2 ~]# cp /usr/local/harbor/harbor.yml.tmpl /usr/local/harbor/harbor.yml
配置SSL证书
过程省略,参考上面的
SSL证书申请过程
修改Harbor配置文件
[root@node1 ~]# vim /usr/local/harbor/harbor.yml
#配置文件并不完整,仅展示修改部分
hostname: harbor.linux.com
#把原来自带的本地数据库配置注释掉
# database:
  # password: root123
  # max_idle_conns: 100
  # max_open_conns: 900
  # conn_max_lifetime: 5m
  # conn_max_idle_time: 0

#删除注释并配置harbor连接外部数据库
external_database:
  harbor:
    host: 192.168.140.12
    port: 5432
    db_name: harbor
    username: harbor
    password: WWW.1.com
    ssl_mode: disable
    max_idle_conns: 2
    max_open_conns: 0
  notary_signer:
    host: 192.168.140.12
    port: 5432
    db_name: harbor_notary_signer
    username: harbor
    password: WWW.1.com
    ssl_mode: disable
  notary_server:
    host: 192.168.140.12
    port: 5432
    db_name: harbor_notary_server
    username: harbor
    password: WWW.1.com
    ssl_mode: disable

#删除注释,并配置远程redis
external_redis:
#   # support redis, redis+sentinel
#   # host for redis: <host_redis>:<port_redis>
#   # host for redis+sentinel:
#   #  <host_sentinel1>:<port_sentinel1>,<host_sentinel2>:<port_sentinel2>,<host_sentinel3>:<port_sentinel3>
  host: 192.168.140.12:6379
#   password:
#   # Redis AUTH command was extended in Redis 6, it is possible to use it in the two-arguments AUTH <username> <password> form.
#   # username:
#   # sentinel_master_set must be set to support redis+sentinel
#   #sentinel_master_set:
#   # db_index 0 is for core, it's unchangeable
  registry_db_index: 1
  jobservice_db_index: 2
  trivy_db_index: 5
  idle_timeout_seconds: 30
拷贝Harbor给node2
[root@node1 ~]# scp -r /usr/local/harbor/ root@192.168.140.11:/usr/local/
启动Harbor
[root@node1 ~]# hostnamectl set-hostname harbor.linux.com
[root@node2 ~]# hostnamectl set-hostname harbor.linux.com
[root@node1 ~]# vim /etc/hosts
192.168.140.10 harbor.linux.com harbor

[root@node2 ~]# vim /etc/hosts
192.168.140.11 harbor.linux.com harbor
[root@harbor1 ~]# bash /usr/local/harbor/prepare
[root@harbor2 ~]# bash /usr/local/harbor/prepare
[root@harbor1 ~]# bash /usr/local/harbor/install.sh
[root@harbor2 ~]# bash /usr/local/harbor/install.sh
[+] Running 8/8
 ✔ Network harbor_harbor        Created                                     0.0s
 ✔ Container harbor-log         Started                                     0.3s
 ✔ Container harbor-portal      Started                                     0.9s
 ✔ Container registry           Started                                     0.8s
 ✔ Container registryctl        Started                                     0.8s
 ✔ Container harbor-core        Started                                     1.0s
 ✔ Container nginx              Started                                     1.5s
 ✔ Container harbor-jobservice  Started                                     1.5s
✔ ----Harbor has been installed and started successfully.----
[root@harbor1 ~]# docker ps
CONTAINER ID   IMAGE                                COMMAND                   CREATED          STATUS                             PORTS                                                                            NAMES
4d56ca0cbd90   goharbor/nginx-photon:v2.8.2         "nginx -g 'daemon of…"   24 seconds ago   Up 22 seconds (health: starting)   0.0.0.0:80->8080/tcp, :::80->8080/tcp, 0.0.0.0:443->8443/tcp, :::443->8443/tcp   nginx
786118e99ce2   goharbor/harbor-jobservice:v2.8.2    "/harbor/entrypoint.…"   24 seconds ago   Up 21 seconds (health: starting)                                                                                    harbor-jobservice
7fbd1fe0f1af   goharbor/harbor-core:v2.8.2          "/harbor/entrypoint.…"   24 seconds ago   Up 22 seconds (health: starting)                                                                                    harbor-core
9fb5740c51b9   goharbor/harbor-portal:v2.8.2        "nginx -g 'daemon of…"   24 seconds ago   Up 22 seconds (health: starting)                                                                                    harbor-portal
723e839195bf   goharbor/registry-photon:v2.8.2      "/home/harbor/entryp…"   24 seconds ago   Up 22 seconds (health: starting)                                                                                    registry
bc4287d96147   goharbor/harbor-registryctl:v2.8.2   "/home/harbor/start.…"   24 seconds ago   Up 22 seconds (health: starting)                                                                                    registryctl
5b62a3cbbc47   goharbor/harbor-log:v2.8.2           "/bin/sh -c /usr/loc…"   24 seconds ago   Up 23 seconds (health: starting)   127.0.0.1:1514->10514/tcp                                                        harbor-log
G.测试Harbor
上传项目测试
[root@harbor1 ~]# docker login harbor.linux.com
Username: admin
Password:
[root@harbor1 ~]# docker tag centos:7 harbor.linux.com/project1/centos:v1
[root@harbor1 ~]# docker push harbor.linux.com/project1/centos:v1

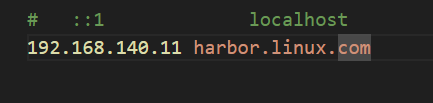
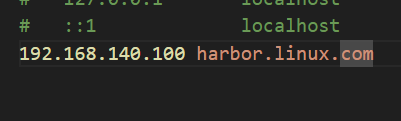
修改hosts文件解析地址
还是正常访问项目
3.配置Harbor高可用
A.编写高可用脚本
[root@harbor1 ~]# vim /opt/harbor.sh
#! /bin/bash

netstat -tunlp | grep 443 &> /dev/null

if [ $? -ne 0 ]; then
    systemctl stop docker
fi
[root@harbor1 ~]# chmod a+x /opt/harbor.sh
[root@harbor1 ~]# scp -r /opt/harbor.sh root@192.168.140.11:/opt/
[root@harbor2 ~]# chmod a+x /opt/harbor.sh
B安装keepalived
[root@harbor1 ~]# yum install -y keepalived
[root@harbor2 ~]# yum install -y keepalived
C.修改keepalived配置文件
[root@harbor1 ~]# vim /etc/keepalived/keepalived.conf
! Configuration File for keepalived

global_defs {
   router_id master_harbor
}

vrrp_script check_harbor {	#引用外部脚本,并且定义名字
    script "/opt/harbor.sh"	#外部脚本路径
    interval 1	#每1秒执行一次脚本
}

vrrp_instance VI_1 {
    state MASTER
    interface ens33
    virtual_router_id 51
    priority 100
    advert_int 1
    authentication {
        auth_type PASS
        auth_pass redhat
    }
    virtual_ipaddress {
        192.168.140.100
    }
    track_script {
        check_harbor		#调用外部脚本,名字是我们上面自己起的
    }
}
[root@harbor2 ~]# vim /etc/keepalived/keepalived.conf
! Configuration File for keepalived

global_defs {
   router_id slave_harbor
}

vrrp_script check_harbor {	#引用外部脚本,并且定义名字
    script "/opt/harbor.sh"	#外部脚本路径
    interval 1	#每1秒执行一次脚本
}

vrrp_instance VI_1 {
    state MASTER
    interface ens33
    virtual_router_id 51
    priority 50
    advert_int 1
    authentication {
        auth_type PASS
        auth_pass redhat
    }
    virtual_ipaddress {
        192.168.140.100
    }
    track_script {
        check_harbor		#调用外部脚本,名字是我们上面自己起的
    }
}
D.启动keepalived
[root@harbor1 ~]# systemctl enable --now keepalived.service
[root@harbor2 ~]# systemctl enable --now keepalived.service
E.测试访问
修改hosts解析
F.模拟容器挂掉
[root@harbor1 ~]# docker stop nginx
nginx
网页测试
还是正常访问
【容器应用系列教程】基于Harbor构建企业级镜像仓库
https://www.wsjj.top/archives/135
评论