

【Linux基础服务教程】Nginx配置文件
默认
配置文件路径:/usr/local/nginx/conf/nginx.conf
一、配置文件的基本结构
全局配置

事件驱动模型配置

http服务配置

http {
    server {

        location {
            响应方式
        }

        location {

        }

        location {}

    }

    server {

    }

    server {

    }
}
- server {}
- 一个
server的配置就对应一个虚拟主机
- 一个
- location {}
匹配客户端访问请求,以不同的方式给客户端响应
1.全局配置
- user nobody;
- 指定启动工作进程的用户
- worker_processes 8;
- 定义Nginx默认启动的工作进程数
- 建议与CPU数量一致,或2倍
- 或者auto设置自动
- error_log logs/error.log notice;
- 定义错误日志
- 错误日志等级:debug, info, notice, warn, error, crit, alert, emerg
2.事件驱动模型配置
- worker_connections 1024;
- 定义工作进程所能接收的
最大连接数
- 定义工作进程所能接收的
- use epoll;
- 定义事件驱动模型
nginx安装在freeBSD Linux时,名称要改为kqueue
3.http服务的相关配置
- include 文件名称;
- 加载子配置文件
- access_log logs/access.log main;
- 定义访问日志
Nginx默认的日志变量 log_format main '$remote_addr - $remote_user [$time_local] “$request” ’
'$status $body_bytes_sent “$http_referer” ’
‘“$http_user_agent” “$http_x_forwarded_for”’;
变量说明:
-
$remote_addr:客户端
地址 -
$remote_user: 基于用户认证访问时,客户端输入的
用户名 -
$time_local: 访问
时间 -
$request: 请求方法
(GET/POST)文件名称HTTP协议版本 -
$status: http
状态码 -
$body_bytes_sent:
响应数据大小,单位字节 -
$http_referer:
超链接地址 -
$http_user_agent:
客户端浏览器类型 -
keepalive_timeout 65
- 定义长连接的空闲
超时时间
- 定义长连接的空闲
-
keepalive_requests 1000;
- 定义长连接的
最大请求数
- 定义长连接的
-
gzip on;
- 启用
gzip压缩
- 启用
二、虚拟主机
1.格式
server{
	xxxxxxxxxxxxx
	xxxxxxxxxxxxx
}
2.参数说明
- listen 80;
- 指定监听
地址,端口 - listen IP:port;
- 指定监听
- server_name localhost;
- 指定网站
主机名 - server_name 名称1 名称2 名称3;
- 指定网站
- location的写法
- 匹配客户端请求,定义不同
响应的方式
- 匹配客户端请求,定义不同
location格式
location uri地址 {
    响应方式
}
location / {			#匹配所有请求
            root   html;			#指定网页目录
            index  index.html index.htm;		#指定首页名称
        }
location /mp3 {		#指定当用户访问/mp3的时候
            root /data;		#指定默认网页目录
            index index.html;		#指定首页名称
        }
location = /game {		#优先级大于上边,必须等于/game
    #...
}
location ~ \.html {		#只要访问的页面包含.html结尾的
    #...
}
3.虚拟主机配置
- 基于
名称的虚拟主机 - 基于
IP的虚拟主机
A.基于名称的虚拟主机
game.linux.com域名/game网页目录
music.linux.com域名/music网页目录
a.配置game网站
创建子配置目录(可选的)
[root@localhost ~]# mkdir /usr/local/nginx/conf.d
配置子配置文件
[root@localhost ~]# vim /usr/local/nginx/conf.d/game.conf
server {
   listen 80;	#指定监听端口
   server_name game.linux.com  game;	#绑定域名
   access_log /usr/local/nginx/logs/game_access.log main;	#访问日志
   error_log /usr/local/nginx/logs/game_error.log error;	#错误日志

   location / {		#配置访问规则
       root /game;		#网页的根目录
       index index.html;	#默认首页
   }
}
在主配置文件加载子配置文件
[root@localhost ~]# vim /usr/local/nginx/conf/nginx.conf
http {
    ..............	#配置文件并不完整,请勿动其他地方
    include /usr/local/nginx/conf.d/game.conf;		#因我们在子配置文件定义了日志记录格式,务必把这条记录放在定义main日志的后面!
}
测试访问
修改
hosts文件,自行测试
b.配置music网站
[root@localhost ~]# vim /usr/local/nginx/conf.d/music.conf

server {
   listen 80;
   server_name music.linux.com;
   access_log  /usr/local/nginx/logs/music_access.log main;
   error_log /usr/local/nginx/logs/music_error.log error;

   location / {
       root /music;
       index index.html;
   }
}
在主配置文件加载子配置文件
[root@localhost ~]# vim /usr/local/nginx/conf/nginx.conf
http {
    ..............	#配置文件并不完整,请勿动其他地方
    include /usr/local/nginx/conf.d/music.conf;		#因我们在子配置文件定义了日志记录格式,务必把这条记录放在定义main日志的后面!
}
测试访问
修改
hosts文件,自行测试
B.基于IP的虚拟主机
shell.linux.com域名192.168.140.100网卡IP/shell网页数据目录
配置网卡
过程省略
编辑子配置文件
[root@localhost ~]# vim /usr/local/nginx/conf.d/shell.conf

server {
   listen 192.168.140.100:80;	#指定网站监听的IP和端口
   server_name shell.linux.com  shell;
   access_log /usr/local/nginx/logs/shell_access.log main;
   error_log /usr/local/nginx/logs/shell_error.log error;

   location / {
       root /shell;
       index index.html;
   }
}
在主配置文件加载子配置文件
[root@localhost ~]# vim /usr/local/nginx/conf/nginx.conf
http {
    ..............	#配置文件并不完整,请勿动其他地方
    include /usr/local/nginx/conf.d/shell.conf;		#因我们在子配置文件定义了日志记录格式,务必把这条记录放在定义main日志的后面!
}
测试访问
修改
hosts文件,自行测试
三、Nginx配置基于https的虚拟主机
1.公有CA配置
Apache配置https网页教程:https://www.wsjj.top/archives/71
A.域名注册
需要提前准备一个域名!!!
个人推荐的几个域名注册机构:阿里云万网、腾讯云、cloudflare
B.申请SSL证书
我这里拿腾讯云做演示
普通个人用户可以选择免费的证书
缺点:只支持主域名和www域名
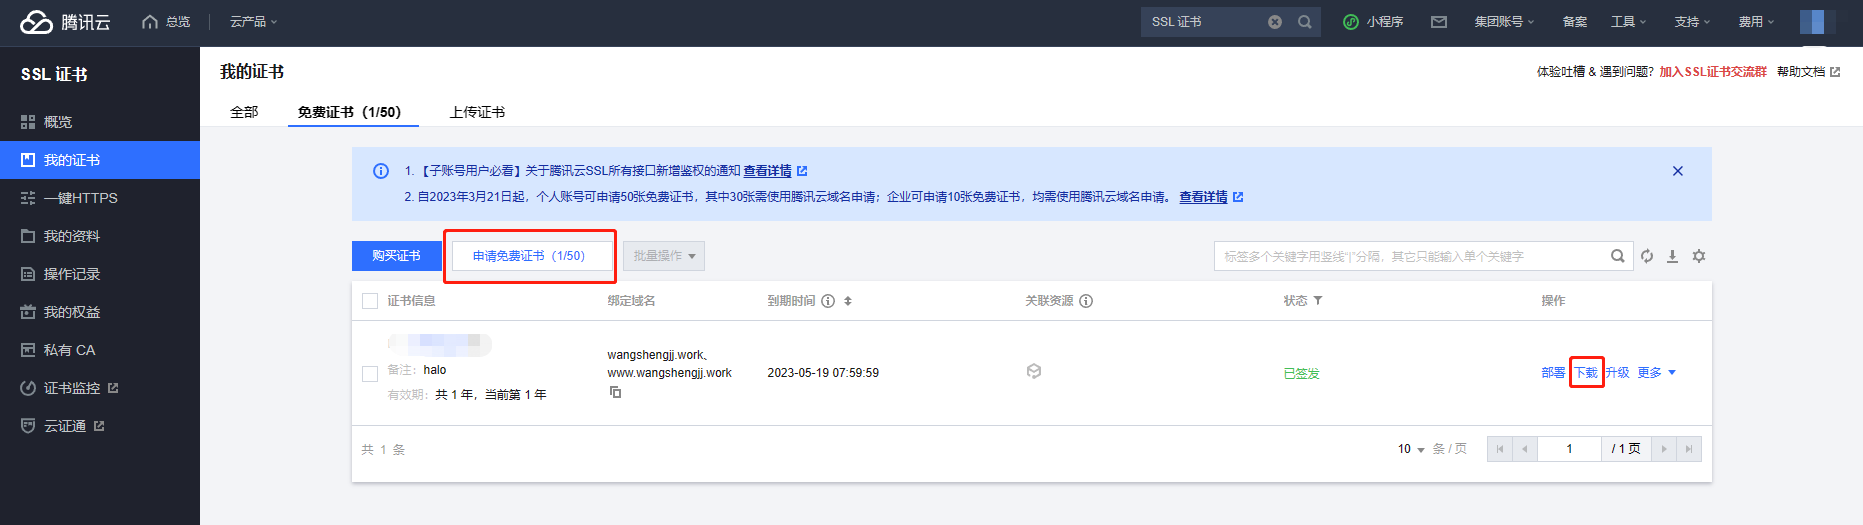
或者选择购买证书
个人推荐购买泛域名证书

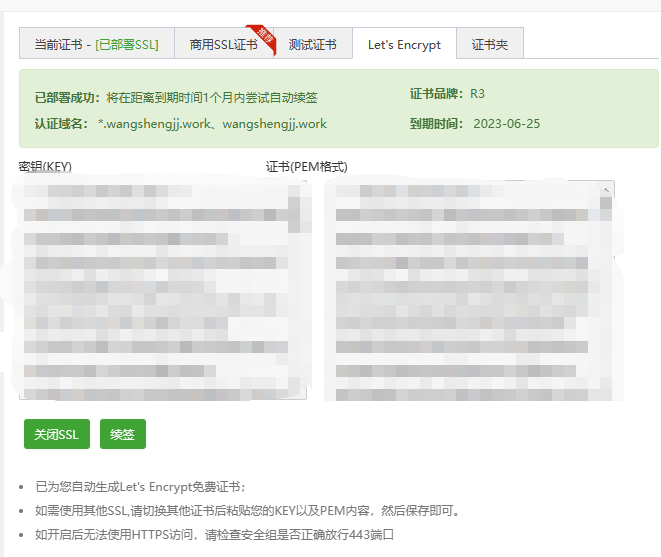
更或者使用Let’s Encrypt的免费证书
虽然只有3个月,但是支持自主续签
C.下载证书
- 目前学的是
Nginx,所以我们选择Nginx证书 - 如果您使用的是其他类型服务器,比如
Apache请选择下载相应的证书

D.编写子配置文件
[root@localhost ~]# vim /usr/local/nginx/conf.d/www.conf

server {
    listen       443 ssl;	#走443端口
    server_name  www.linux.com;

    ssl_certificate      /usr/local/nginx/ssl/www.linux.com.crt;	#指定证书文件
    ssl_certificate_key  /usr/local/nginx/ssl/www.linux.com.key;	#指定秘钥文件

    ssl_session_cache    shared:SSL:1m;
    ssl_session_timeout  5m;

    ssl_ciphers  HIGH:!aNULL:!MD5;
    ssl_prefer_server_ciphers  on;

    location / {
        root   /www;
        index  index.html index.htm;
    }
}
[root@localhost ~]# /usr/local/nginx/sbin/nginx -s reload	#重新加载配置文件
[root@localhost ~]#
[root@localhost ~]# netstat -antp | grep nginx
tcp        0      0 0.0.0.0:80              0.0.0.0:*               LISTEN      6489/nginx: master
tcp        0      0 0.0.0.0:443             0.0.0.0:*               LISTEN      6489/nginx: master
E.浏览器测试访问
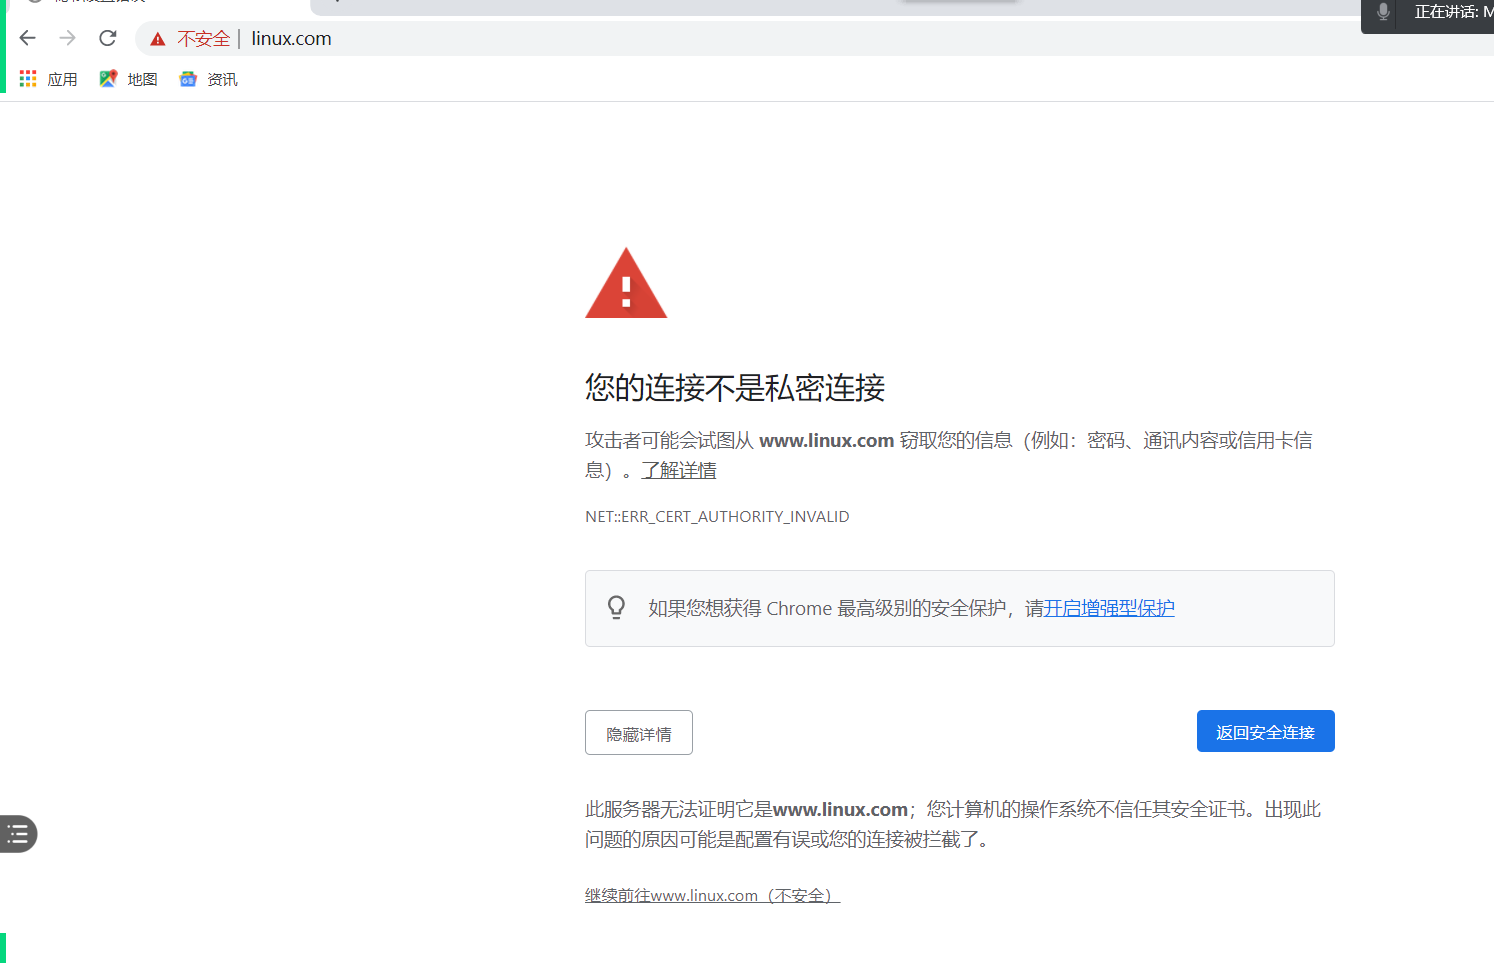
选择
高级-继续访问
报错原因:浏览器会自动查找网上的公有CA验证,因为我们是私有CA,没有在公网认证所以会有这个提示
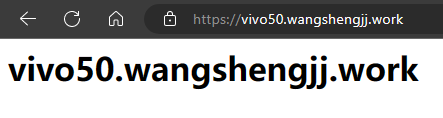
通过公有CA认证后的效果
不会
提示不安全
2.私有CA
A.创建CA服务器需要的库文件
自行准备第二台虚拟机当做CA服务器
[root@ca ~]# touch /etc/pki/CA/index.txt
[root@ca ~]# echo 01 > /etc/pki/CA/serial
B.创建CA服务器需要的秘钥
[root@ca ~]# openssl genrsa -out /etc/pki/CA/private/cakey.pem 1024
Generating RSA private key, 1024 bit long modulus
..++++++
.....++++++
e is 65537 (0x10001)
C.颁发自签证书
[root@ca ~]# openssl req -new -x509 -key /etc/pki/CA/private/cakey.pem -out /etc/pki/CA/cacert.pem -days 3650

You are about to be asked to enter information that will be incorporated
into your certificate request.
What you are about to enter is what is called a Distinguished Name or a DN.
There are quite a few fields but you can leave some blank
For some fields there will be a default value,
If you enter '.', the field will be left blank.
-----
Country Name (2 letter code) [XX]:china
string is too long, it needs to be less than  2 bytes long
Country Name (2 letter code) [XX]:cn
State or Province Name (full name) []:bj
Locality Name (eg, city) [Default City]:bj
Organization Name (eg, company) [Default Company Ltd]:bj
Organizational Unit Name (eg, section) []:bj
Common Name (eg, your name or your server's hostname) []:ca.linux.com
Email Address []:bj@qq.com

[root@ca ~]# ls /etc/pki/CA/
cacert.pem  certs  crl  index.txt  newcerts  private  serial
D.在web服务器申请证书
回到web服务器
[root@web_server ~]# mkdir /etc/httpd/ssl
[root@web_server ~]# openssl genrsa -out /etc/httpd/ssl/www.linux.com.key 2048
Generating RSA private key, 2048 bit long modulus
......................+++
.....................................................................+++
e is 65537 (0x10001)
E.创建证书申请
[root@localhost ~]# openssl req -new -key /etc/httpd/ssl/www.linux.com.key -out /etc/httpd/ssl/www.linux.com.csr

You are about to be asked to enter information that will be incorporated
into your certificate request.
What you are about to enter is what is called a Distinguished Name or a DN.
There are quite a few fields but you can leave some blank
For some fields there will be a default value,
If you enter '.', the field will be left blank.
-----
Country Name (2 letter code) [XX]:cn	#注意这里的信息需要和CA服务器一致
State or Province Name (full name) []:bj	#注意这里的信息需要和CA服务器一致
Locality Name (eg, city) [Default City]:bj	#注意这里的信息需要和CA服务器一致
Organization Name (eg, company) [Default Company Ltd]:bj	#注意这里的信息需要和CA服务器一致
Organizational Unit Name (eg, section) []:bj	#注意这里的信息需要和CA服务器一致
Common Name (eg, your name or your server's hostname) []:www.linux.com	#这里填写自己的域名
Email Address []:bj@qq.com

Please enter the following 'extra' attributes
to be sent with your certificate request
A challenge password []:
An optional company name []:
F.证书发送给CA服务器
[root@web_server ~]# rsync -av /usr/local/nginx/ssl/www.linux.com.csr root@192.168.140.11:/tmp/ #IP为CA服务器
G.CA服务器签署证书
[root@ca ~]# openssl ca -in /tmp/www.linux.com.csr -out /etc/pki/tls/certs/www.linux.com.crt -days 3650 	#证书有效10年
Using configuration from /etc/pki/tls/openssl.cnf
Check that the request matches the signature
Signature ok
Certificate Details:
        Serial Number: 1 (0x1)
        Validity
            Not Before: Jun 21 06:06:54 2021 GMT
            Not After : Jun 19 06:06:54 2031 GMT
        Subject:
            countryName               = cn
            stateOrProvinceName       = bj
            organizationName          = bj
            organizationalUnitName    = bj
            commonName                = www.linux.com
            emailAddress              = bj@qq.com
        X509v3 extensions:
            X509v3 Basic Constraints:
                CA:FALSE
            Netscape Comment:
                OpenSSL Generated Certificate
            X509v3 Subject Key Identifier:
                67:6D:B8:84:3A:5C:BE:99:81:4A:49:F4:CD:61:5E:8B:99:3B:EF:13
            X509v3 Authority Key Identifier:
                keyid:C8:EF:D2:FB:E8:D5:2B:50:D8:7C:07:7A:27:72:B5:D6:33:09:D6:56

Certificate is to be certified until Jun 19 06:06:54 2031 GMT (3650 days)
Sign the certificate? [y/n]:y


1 out of 1 certificate requests certified, commit? [y/n]y
Write out database with 1 new entries
Data Base Updated
H.查看刚刚颁发的证书文件
[root@ca ~]# ls /etc/pki/tls/certs/
ca-bundle.crt  ca-bundle.trust.crt  make-dummy-cert  Makefile  renew-dummy-cert  www.linux.com.crt
[root@ca ~]#
[root@ca ~]# cat /etc/pki/CA/serial		#从01变成02
02
[root@ca ~]# cat /etc/pki/CA/index.txt
V	310619060654Z		01	unknown	/C=cn/ST=bj/O=bj/OU=bj/CN=www.linux.com/emailAddress=bj@qq.com
I.将签好的证书送给web服务器
[root@ca ~]# rsync -av /etc/pki/tls/certs/www.linux.com.crt root@192.168.140.10:/etc/httpd/ssl
J.编辑子配置文件
[root@localhost ~]# vim /usr/local/nginx/conf.d/www.conf

server {
    listen       443 ssl;	#走443端口
    server_name  www.linux.com;

    ssl_certificate      /usr/local/nginx/ssl/www.linux.com.crt;	#指定证书文件
    ssl_certificate_key  /usr/local/nginx/ssl/www.linux.com.key;	#指定秘钥文件

    ssl_session_cache    shared:SSL:1m;
    ssl_session_timeout  5m;

    ssl_ciphers  HIGH:!aNULL:!MD5;
    ssl_prefer_server_ciphers  on;

    location / {
        root   /www;
        index  index.html index.htm;
    }
}
[root@localhost ~]# /usr/local/nginx/sbin/nginx -s reload	#重新加载配置文件
[root@localhost ~]#
[root@localhost ~]# netstat -antp | grep nginx
tcp        0      0 0.0.0.0:80              0.0.0.0:*               LISTEN      6489/nginx: master
tcp        0      0 0.0.0.0:443             0.0.0.0:*               LISTEN      6489/nginx: master
H.浏览器测试访问
选择
高级-继续访问
报错原因:浏览器会自动查找网上的公有CA验证,因为我们是私有CA,没有在公网认证所以会有这个提示
四、虚拟主机认证配置
- 基于客户端进行认证
- 基于用户进行认证
1.基于客户端进行认证
- allow IP地址 | 网段 | 所有; #允许
- deny IP地址 | 网段 | 所有; #禁止
location / {
       root /game;
       index index.html;
       allow 192.168.140.1;		#仅允许这个IP访问
       deny all;	#其他IP全部拒绝访问
   }
2.基于用户认证
安装依赖
[root@localhost ~]# yum install -y httpd-tools
[root@localhost ~]# htpasswd -c /usr/local/nginx/.webuser martin
New password:
Re-type new password:
Adding password for user martin

[root@localhost ~]# cat /usr/local/nginx/.webuser 	#需要用户文件(必须)
martin:$apr1$xzsVq5jH$cWhtMrHoYdmv8CvuiY3hM/
编辑配置文件
location / {
       root /game;
       index index.html;
       auth_basic "Login:";
       auth_basic_user_file /usr/local/nginx/.webuser;	#指定用户文件
   }
五、自动列出文件
Nginx这一点跟Apache不同,Apache当没有index页面的时候,会自动列出网页目录下的所有文件,Nginx需要手动添加配置,才会列出文件,否则提示403错误。
server {
   listen 80;
   server_name music.linux.com;
   access_log  /usr/local/nginx/logs/music_access.log main;
   error_log /usr/local/nginx/logs/music_error.log error;

   location / {
       root /music;
       index index.html;
       autoindex on;	#自动列出文件
   }
}
六、stub_status显示nginx工作状态
   location /state {	#当用户访问域名/status的时候
      stub_status;	#显示工作状态
      allow 192.168.140.1;
      deny all;
   }
Active connections: 1
server accepts handled requests
 94 94 254
Reading: 0 Writing: 1 Waiting: 0
- Active connections
- 当前
正在处理的连接数
- 当前
- accepts
接收的连接数
- handled
处理的连接数
- requests
- 处理的
请求数
- 处理的
【Linux基础服务教程】Nginx配置文件
https://www.wsjj.top/archives/84
评论