

【Linux集群系列教程】高可用Typecho博客搭建教程
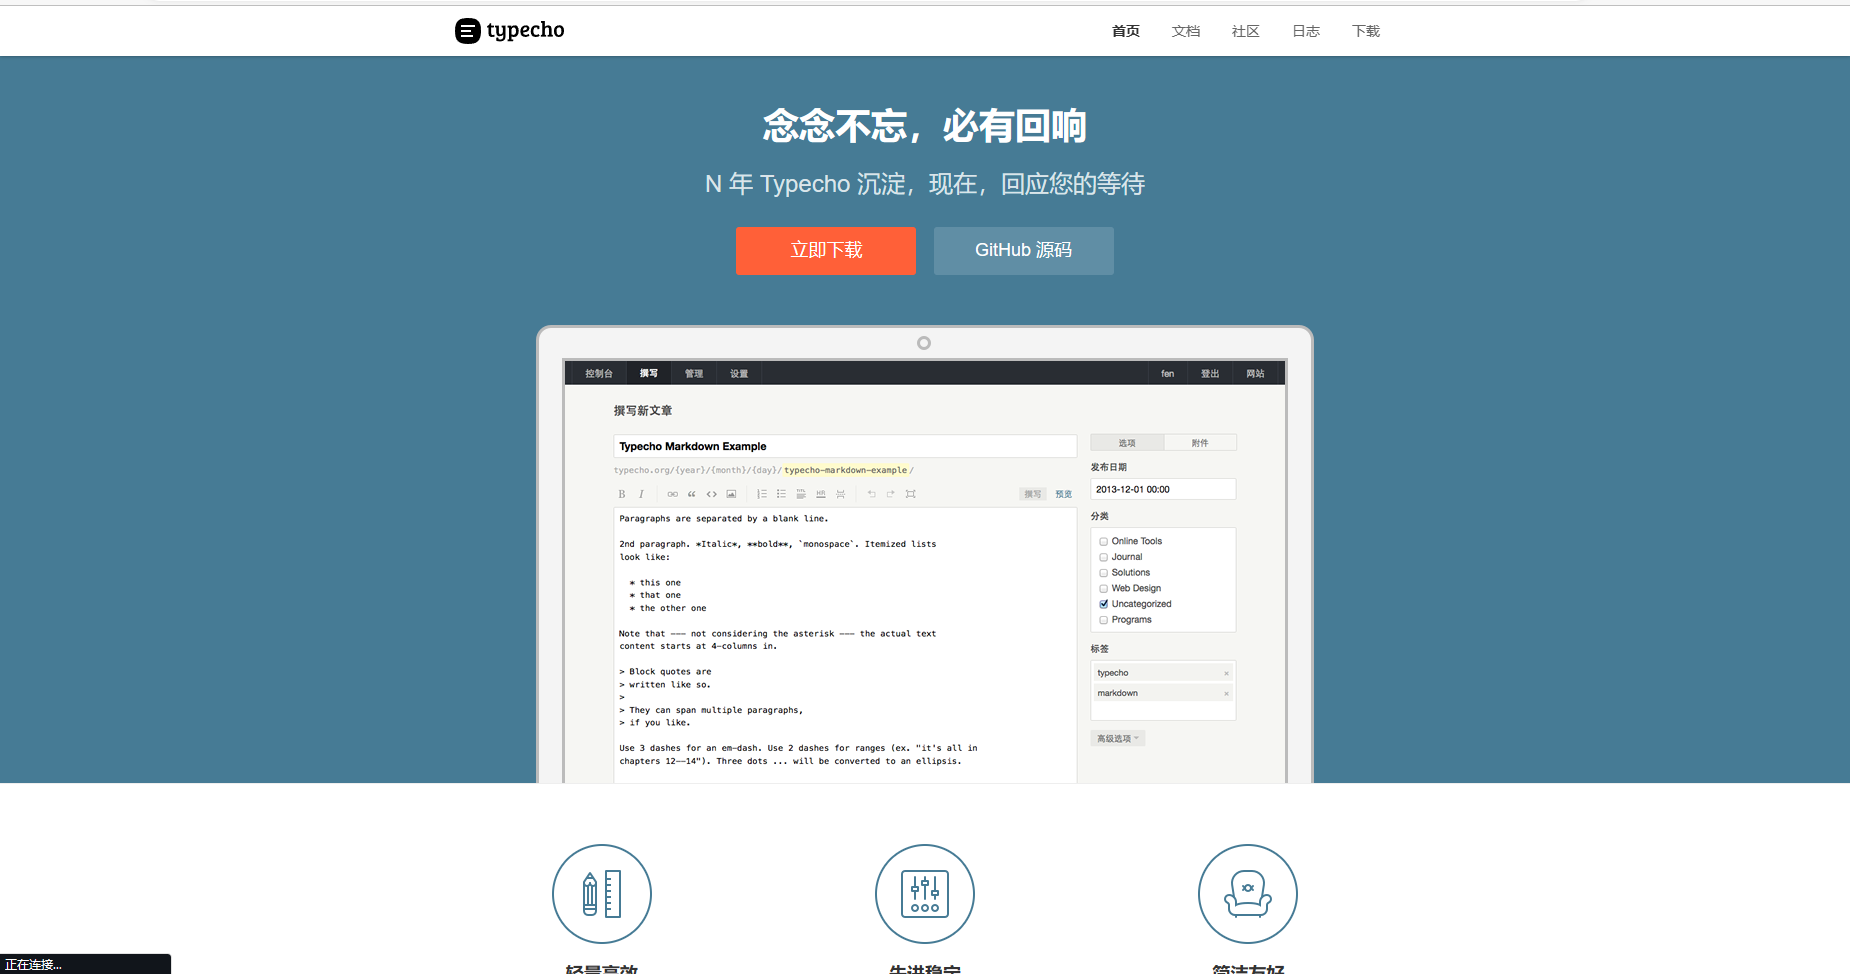
关于Typecho的介绍:
Typecho是由type和echo两个词合成的,来自于开发团队的头脑风暴。Typecho基于PHP5开发,支持多种数据库,是一款内核强健﹑扩展方便﹑体验友好﹑运行流畅的轻量级开源博客程序。选用Typecho,搭建独一无二个人网络日志发布平台,享受创作的快乐。
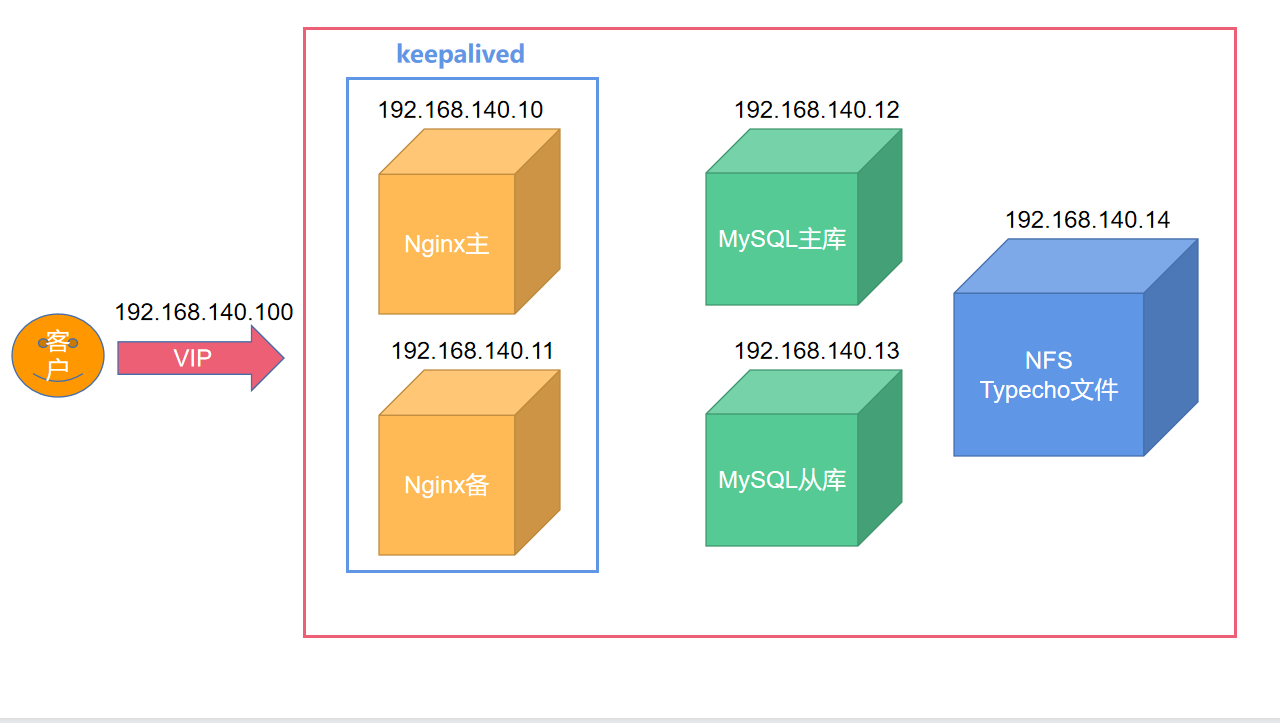
一、集群规划
| 主机名 | IP地址 | 系统版本 | 软件 |
|---|---|---|---|
| webserver01.linux.com | 192.168.140.10 | Centos7.9 | keepalived、Nginx、PHP7.4、nfs-utils |
| webserver02.linux.com | 192.168.140.11 | Centos7.9 | keepalived、Nginx、PHP7.4、nfs-utils |
| dbserver01.linux.com | 192.168.140.12 | Centos7.9 | MySQL5.7 |
| dbserver02.linux.com | 192.168.140.13 | Centos7.9 | MySQL5.7 |
| dataserver.linux.com | 192.168.140.14 | Centos7.9 | nfs-utils、typecho |
二、准备阶段
1.四台服务器关闭防火墙和SElinux、配置时间同步(重要)
关闭防火墙和
SElinux过程省略
四台服务器配置时间同步
yum install -y ntpdate
计划任务依赖
crond服务
systemctl enable --now crond
crontab -e

* 1 * * * /usr/sbin/ntpdate ntp.ntsc.ac.cn &> /dev/null
2.配置NFS服务器
A.安装nfs-server依赖
[root@dataserver ~]# yum install -y nfs-utils rpcbind wget unzip
B.准备Typecho安装包
[root@dataserver ~]# wget https://github.com/typecho/typecho/releases/latest/download/typecho.zip
[root@dataserver ~]# mkdir /data
[root@dataserver ~]# unzip -d /data ./typecho.zip
[root@dataserver ~]# ls /data
admin  index.php  install  install.php  LICENSE.txt  usr  var
C.配置NFS共享规则
[root@dataserver ~]# vim /etc/exports

/data   192.168.140.*(rw,async,no_root_squash)
- 允许
192.168.140.0这个网段连接NFS服务器 rw拥有读写权限async表示同步模式no_root_squash保留root权限
D.启动nfs-server服务
[root@dataserver ~]# systemctl enable --now nfs-server
[root@dataserver ~]# exportfs -avr
exporting 192.168.140.*:/data
E.前端web服务器挂载共享路径
安装驱动,让服务器识别NFS文件系统
[root@webserver01 ~]# yum install -y nfs-utils
[root@webserver02 ~]# yum install -y nfs-utils
创建挂载路径
[root@webserver01 ~]# mkdir /typecho
[root@webserver02 ~]# mkdir /typecho
挂载NFS共享目录到本地/typecho目录
[root@webserver01 ~]# vim /etc/fstab
#末尾添加挂载内容
192.168.140.14:/data    /typecho        nfs     defaults 0 0
[root@webserver02 ~]# vim /etc/fstab
#末尾添加挂载内容
192.168.140.14:/data    /typecho        nfs     defaults 0 0
[root@webserver01 ~]# mount -a
[root@webserver02 ~]# mount -a
检查/typecho目录是否有文件
可以看到
2台webserver都有typecho的安装文件了
[root@webserver01 ~]# ls /typecho/
admin  index.php  install  install.php  LICENSE.txt  usr  var

[root@webserver02 ~]# ls /typecho/
admin  index.php  install  install.php  LICENSE.txt  usr  var
三、配置MySQL主从复制环境
1.下载MySQL安装文件
[root@dbserver01 ~]# wget https://cdn.mysql.com//Downloads/MySQL-5.7/mysql-5.7.41-1.el7.x86_64.rpm-bundle.tar
2.制作本地Yum仓库
A.创建仓库目录
[root@dbserver01 ~]# mkdir /mysql57
B.解压mysql.rpm文件到目录
[root@dbserver01 ~]# tar xf mysql-5.7.41-1.el7.x86_64.rpm-bundle.tar -C /mysql57
C.制作本地Yum仓库
[root@dbserver01 ~]# yum install -y createrepo
[root@dbserver01 ~]# createrepo /mysql57
Spawning worker 0 with 10 pkgs
Workers Finished
Saving Primary metadata
Saving file lists metadata
Saving other metadata
Generating sqlite DBs
Sqlite DBs complete
D.编写MySQL本地Yum源
[root@dbserver01 ~]# vim /etc/yum.repos.d/mysql.repo

[mysql]
name=mysql5.7
baseurl=file:///mysql57
enabled=1
gpgcheck=0
3.拷贝本地Yum源和仓库给第二台服务器
[root@dbserver01 ~]# scp -r /mysql57 root@192.168.140.13:/
[root@dbserver01 ~]# scp -r /etc/yum.repos.d/mysql.repo root@192.168.140.13:/etc/yum.repos.d/
4.清理Yum源
[root@dbserver01 ~]# yum clean all
[root@dbserver02~]# yum clean all
5.安装MySQL5.7
[root@dbserver01 ~]# yum install -y mysql-community-server
[root@dbserver02~]# yum install -y mysql-community-server
6.修改my.cnf配置文件
A.配置master库
[root@dbserver01 ~]# vim /etc/my.cnf
#配置文件不完整,仅展示添加部分
[mysqld]
server_id=12	#指定serverID
log_bin=master	#开启二进制日志文件
gtid_mode=on	#开启事务ID
enforce_gtid_consistency=true	#强制GTID的一致性
B.配置slave库
[root@dbserver02 ~]# vim /etc/my.cnf
#配置文件不完整,仅展示添加部分
[mysqld]
server_id=13	#指定serverID
log_bin=slave	#开启二进制日志文件
gtid_mode=on	#开启事务ID
enforce_gtid_consistency=true	#强制GTID的一致性
C.启动MySQL服务
[root@dbserver01 ~]# systemctl enable --now mysqld
[root@dbserver02 ~]# systemctl enable --now mysqld
7.修改MySQL中root用户密码
A.获取root临时密码
[root@dbserver01 ~]# grep -i "password" /var/log/mysqld.log
2023-07-13T03:23:51.305535Z 1 [Note] A temporary password is generated for root@localhost: s.dyNKC(n3fq

#如果你的随机密码跟我一样有特殊字符,请使用\转义

[root@dbserver02 ~]# grep -i "password" /var/log/mysqld.log
2023-07-13T03:24:07.113851Z 1 [Note] A temporary password is generated for root@localhost: nO,w3xTMd+ne
B.使用临时密码登录数据库
[root@dbserver01 ~]# mysql -uroot -ps.dyNKC\(n3fq

[root@dbserver02 ~]# mysql -uroot -pnO,w3xTMd+ne
C.修改MySQL中root用户密码
set password for '用户名'@'连接地址' = PASSWORD("密码");
mysql> set password for 'root'@'localhost' = PASSWORD("WWW.1.com");
Query OK, 0 rows affected, 1 warning (0.00 sec)

mysql> set password for 'root'@'localhost' = PASSWORD("WWW.1.com");
Query OK, 0 rows affected, 1 warning (0.00 sec)
8.创建主从复制用到的用户和Typecho博客用到的库和用户
此操作只需要在主库操作即可
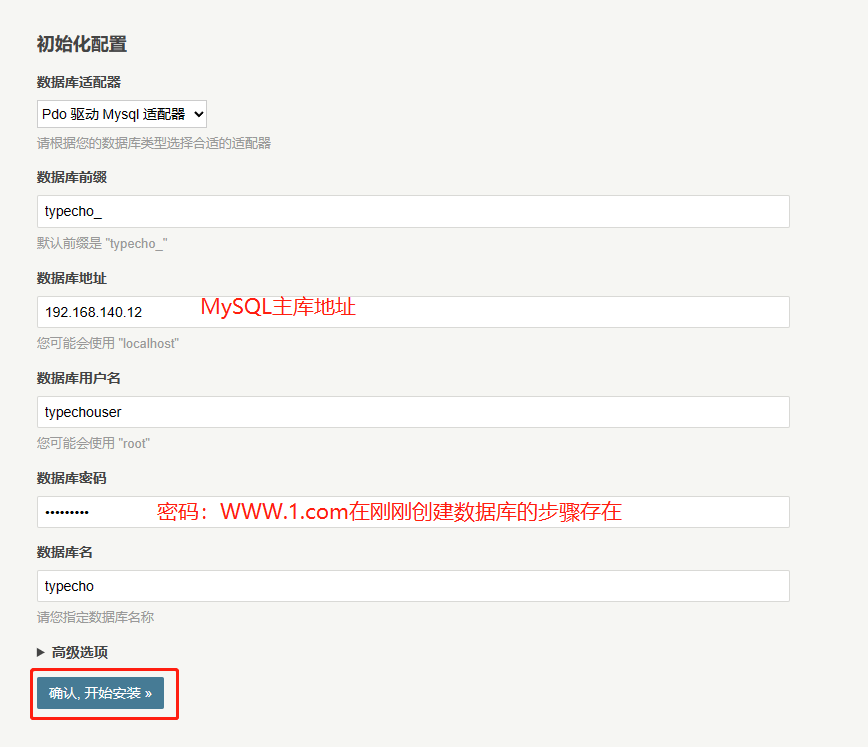
mysql> create database typecho charset utf8mb4;
Query OK, 1 row affected (0.00 sec)

#创建typechouser用户授权typecho库所有权限,密码是WWW.1.com
mysql> grant all on typecho.* to 'typechouser'@'192.168.140.%' identified by 'WWW.1.com';
Query OK, 0 rows affected, 1 warning (0.00 sec)

#因为从库地址是192.168.140.13所以授权这个IP,并且创建了一个repluser用户
mysql> grant replication slave on *.* to 'repluser'@'192.168.140.13' identified by 'WWW.1.com';
Query OK, 0 rows affected, 1 warning (0.01 sec)
9.配置从库连接主库
此操作需要到从库操作
mysql> change master to
    -> master_host="192.168.140.12",
    -> master_user="repluser",
    -> master_password="WWW.1.com",
    -> master_auto_position=1;
Query OK, 0 rows affected, 2 warnings (0.01 sec)
mysql> start slave;
Query OK, 0 rows affected (0.00 sec)

mysql> show slave status\G;
*************************** 1. row ***************************
               Slave_IO_State: Waiting for master to send event
                  Master_Host: 192.168.140.12
                  Master_User: repluser
                  Master_Port: 3306
                Connect_Retry: 60
              Master_Log_File: master.000002
          Read_Master_Log_Pos: 1193
               Relay_Log_File: dbserver02-relay-bin.000002
                Relay_Log_Pos: 1400
        Relay_Master_Log_File: master.000002
             Slave_IO_Running: Yes	#IO线程正常
            Slave_SQL_Running: Yes	#SQL线程正常
检查是否同步成功
可以看到
typecho的库已经同步到从库了
mysql> show databases;
+--------------------+
| Database           |
+--------------------+
| information_schema |
| mysql              |
| performance_schema |
| sys                |
| typecho            |
+--------------------+
5 rows in set (0.00 sec)
四、配置webserver
1.安装PHP7.4
A.安装epel源
[root@webserver01 ~]# yum install -y epel-release
[root@webserver02 ~]# yum install -y epel-release
B.配置remi源
[root@webserver01 ~]# yum -y install https://rpms.remirepo.net/enterprise/remi-release-7.rpm
[root@webserver02 ~]# yum -y install https://rpms.remirepo.net/enterprise/remi-release-7.rpm
C.安装PHP7.4
[root@webserver01 ~]# yum install -y yum-utils
[root@webserver02 ~]# yum install -y yum-utils
[root@webserver01 ~]# yum-config-manager --enable remi-php74
[root@webserver02 ~]# yum-config-manager --enable remi-php74
[root@webserver01 ~]# yum install -y php  php-cli php-fpm php-mysqlnd php-zip php-devel php-gd php-mcrypt php-mbstring php-curl php-xml php-pear php-bcmath php-json php-redis
[root@webserver02 ~]# yum install -y php  php-cli php-fpm php-mysqlnd php-zip php-devel php-gd php-mcrypt php-mbstring php-curl php-xml php-pear php-bcmath php-json php-redis
D.启动PHP7.4服务
[root@webserver01 ~]# systemctl enable --now php-fpm
[root@webserver02 ~]# systemctl enable --now php-fpm
E.查看PHP版本
[root@webserver01 ~]# php -v
PHP 7.4.33 (cli) (built: Jun  6 2023 16:33:05) ( NTS )
Copyright (c) The PHP Group
Zend Engine v3.4.0, Copyright (c) Zend Technologies

[root@webserver02 ~]# php -v
PHP 7.4.33 (cli) (built: Jun  6 2023 16:33:05) ( NTS )
Copyright (c) The PHP Group
Zend Engine v3.4.0, Copyright (c) Zend Technologies
F.修改PHP运行用户
[root@webserver01 ~]# useradd -s /sbin/nologin nginx
[root@webserver02 ~]# useradd -s /sbin/nologin nginx
[root@webserver01 ~]# vim /etc/php-fpm.d/www.conf
#配置文件不完整,仅展示修改部分
user = nginx	#修改用户为nginx
group = nginx	#修改用户为nginx
[root@webserver02 ~]# vim /etc/php-fpm.d/www.conf
#配置文件不完整,仅展示修改部分
user = nginx	#修改用户为nginx
group = nginx	#修改用户为nginx
[root@webserver01 ~]# systemctl restart php-fpm
[root@webserver02 ~]# systemctl restart php-fpm
2.安装Nginx
A.下载Nginx并且拷贝给web2服务器
[root@webserver01 ~]# wget http://nginx.org/download/nginx-1.20.2.tar.gz
[root@webserver01 ~]# tar xf nginx-1.20.2.tar.gz
[root@webserver01 ~]# scp -r ./nginx-1.20.2 root@192.168.140.11:/root/
B.安装必要的依赖和创建必要的目录
[root@webserver01 ~]# yum install -y gcc openssl-devel pcre-devel zlib-devel
[root@webserver02 ~]# yum install -y gcc openssl-devel pcre-devel zlib-devel
[root@webserver01 ~]# mkdir -p /var/tmp/nginx/{client,proxy,fastcgi,uwsgi,scgi}
[root@webserver02 ~]# mkdir -p /var/tmp/nginx/{client,proxy,fastcgi,uwsgi,scgi}
C.编译安装Nginx
[root@webserver01 ~]# cd nginx-1.20.2/
[root@webserver02 ~]# cd nginx-1.20.2/
[root@webserver01 nginx-1.20.2]# ./configure --prefix=/usr/local/nginx --user=nginx --group=nginx --with-http_ssl_module --with-stream --with-http_flv_module --with-http_stub_status_module --with-http_gzip_static_module --with-pcre --with-file-aio --with-http_secure_link_module --with-threads --http-client-body-temp-path=/var/tmp/nginx/client/ --http-proxy-temp-path=/var/tmp/nginx/proxy/ --http-fastcgi-temp-path=/var/tmp/nginx/fastcgi/ --http-uwsgi-temp-path=/var/tmp/nginx/uwsgi/ --http-scgi-temp-path=/var/tmp/nginx/scgi/

[root@webserver02 nginx-1.20.2]# ./configure --prefix=/usr/local/nginx --user=nginx --group=nginx --with-http_ssl_module --with-stream --with-http_flv_module --with-http_stub_status_module --with-http_gzip_static_module --with-pcre --with-file-aio --with-http_secure_link_module --with-threads --http-client-body-temp-path=/var/tmp/nginx/client/ --http-proxy-temp-path=/var/tmp/nginx/proxy/ --http-fastcgi-temp-path=/var/tmp/nginx/fastcgi/ --http-uwsgi-temp-path=/var/tmp/nginx/uwsgi/ --http-scgi-temp-path=/var/tmp/nginx/scgi/
[root@webserver01 nginx-1.20.2]# make && make install
[root@webserver02 nginx-1.20.2]# make && make install
D.启动Nginx并且测试
[root@webserver01 ~]# /usr/local/nginx/sbin/nginx
[root@webserver02 ~]# /usr/local/nginx/sbin/nginx
[root@webserver01 ~]# netstat -tunlp | grep nginx
tcp        0      0 0.0.0.0:80              0.0.0.0:*               LISTEN      11841/nginx: master

[root@webserver02 ~]# netstat -tunlp | grep nginx
tcp        0      0 0.0.0.0:80              0.0.0.0:*               LISTEN      11841/nginx: master
F.创建命令软连接并且把Nginx加入到开机启动项
[root@webserver01 ~]# ln -s /usr/local/nginx/sbin/nginx /usr/local/bin/
[root@webserver02 ~]# ln -s /usr/local/nginx/sbin/nginx /usr/local/bin/
[root@webserver01 ~]# sed -ri '$a \/usr/local/nginx/sbin/nginx' /etc/rc.d/rc.local
[root@webserver01 ~]# chmod a+x /etc/rc.d/rc.local

[root@webserver02 ~]# sed -ri '$a \/usr/local/nginx/sbin/nginx' /etc/rc.d/rc.local
[root@webserver02 ~]# chmod a+x /etc/rc.d/rc.local
G.检查Nginx版本
[root@webserver01 ~]# nginx -v
nginx version: nginx/1.20.2

[root@webserver02 ~]# nginx -v
nginx version: nginx/1.20.2
3.配置Typecho主页
A.创建子配置文件目录
[root@webserver01 ~]# mkdir /usr/local/nginx/conf.d
[root@webserver02 ~]# mkdir /usr/local/nginx/conf.d
B.把子配置文件目录加载到主配置文件内
[root@webserver01 ~]# vim /usr/local/nginx/conf/nginx.conf
#配置文件并不完整,请勿删改其他
http {
    include       mime.types;
    default_type  application/octet-stream;

    log_format  main  '$remote_addr - $remote_user [$time_local] "$request" '	#删除注释,启用日志功能
                      '$status $body_bytes_sent "$http_referer" '	#删除注释
                      '"$http_user_agent" "$http_x_forwarded_for"';	#删除注释

    access_log  logs/access.log  main;
    include /usr/local/nginx/conf.d/*.conf;	#加载子配置文件目录

    sendfile        on;
    #tcp_nopush     on;

    #keepalive_timeout  0;
    keepalive_timeout  65;

    gzip  on;
[root@webserver02 ~]# vim /usr/local/nginx/conf/nginx.conf
#配置文件并不完整,请勿删改其他
http {
    include       mime.types;
    default_type  application/octet-stream;

    log_format  main  '$remote_addr - $remote_user [$time_local] "$request" '	#删除注释,启用日志功能
                      '$status $body_bytes_sent "$http_referer" '	#删除注释
                      '"$http_user_agent" "$http_x_forwarded_for"';	#删除注释

    access_log  logs/access.log  main;
    include /usr/local/nginx/conf.d/*.conf;	#加载子配置文件目录

    sendfile        on;
    #tcp_nopush     on;

    #keepalive_timeout  0;
    keepalive_timeout  65;

    gzip  on;
[root@webserver01 ~]# nginx -t
nginx: the configuration file /usr/local/nginx/conf/nginx.conf syntax is ok
nginx: configuration file /usr/local/nginx/conf/nginx.conf test is successful

[root@webserver02 ~]# nginx -t
nginx: the configuration file /usr/local/nginx/conf/nginx.conf syntax is ok
nginx: configuration file /usr/local/nginx/conf/nginx.conf test is successful
[root@webserver01 ~]# nginx -s reload	#重新加载配置文件
[root@webserver02 ~]# nginx -s reload
C.创建Typecho子配置文件
[root@webserver01 ~]# vim /usr/local/nginx/conf.d/blog.conf

server {
   listen 80;	#指定监听端口
   server_name localhost;	#指定网站名
   access_log /var/log/nginx/blog_access.log main;		#指定访问日志,和记录格式
   error_log /var/log/nginx/blog_error.log error;		#指定错误日志和记录格式

   location / {
       root /typecho;		#指定网站数据目录
       index index.html index.php;		#指定首页
       if (-f $request_filename/index.php){	#伪静态配置,Typecho博客必须拥有此项配置
            rewrite (.*) $1/index.php;
            }
            if (!-f $request_filename){
            rewrite (.*) /index.php;
            }
   }
   location ~ \.php$ {	#配置php相关配置
       root           /typecho;	#php的目录
       fastcgi_pass   127.0.0.1:9000;	#监听IP和端口
       fastcgi_index  index.php;
       fastcgi_param  SCRIPT_FILENAME  $document_root$fastcgi_script_name;	   #$document_root是Nginx里自带的一个变量,用于传递上面的目录
       include        fastcgi_params;
   }
}
拷贝文件给web2
[root@webserver01 ~]# scp -r /usr/local/nginx/conf.d/blog.conf root@192.168.140.11:/usr/local/nginx/conf.d/
创建日志文件用到的目录
[root@webserver01 ~]# mkdir /var/log/nginx
[root@webserver02 ~]# mkdir /var/log/nginx
Nginx重新加载配置文件
[root@webserver01 ~]# nginx -t
nginx: [warn] conflicting server name "localhost" on 0.0.0.0:80, ignored
nginx: the configuration file /usr/local/nginx/conf/nginx.conf syntax is ok
nginx: configuration file /usr/local/nginx/conf/nginx.conf test is successful

[root@webserver02 ~]# nginx -t
nginx: [warn] conflicting server name "localhost" on 0.0.0.0:80, ignored
nginx: the configuration file /usr/local/nginx/conf/nginx.conf syntax is ok
nginx: configuration file /usr/local/nginx/conf/nginx.conf test is successful
[root@webserver01 ~]# nginx -s reload
[root@webserver02 ~]# nginx -s reload
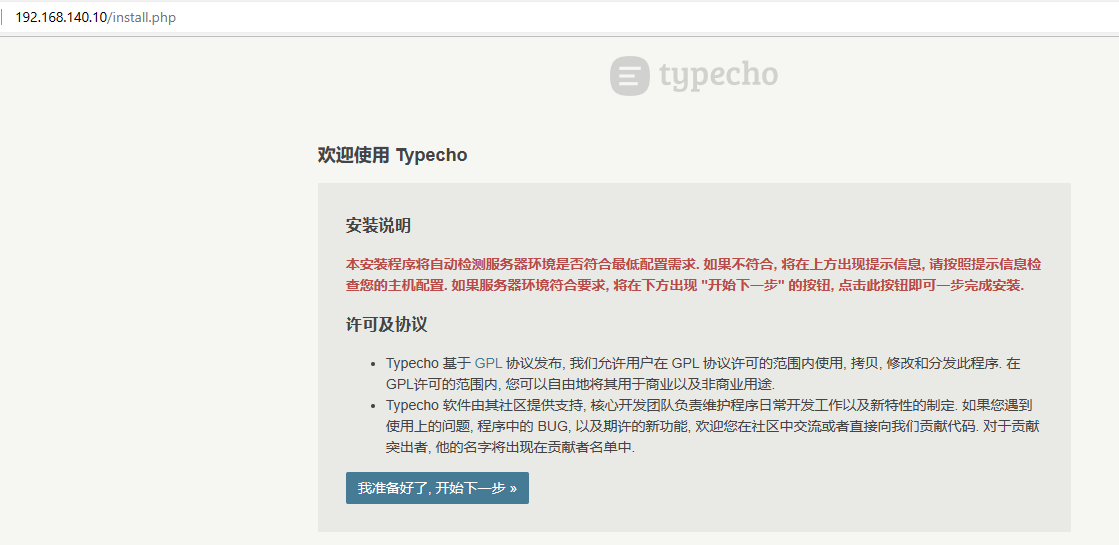
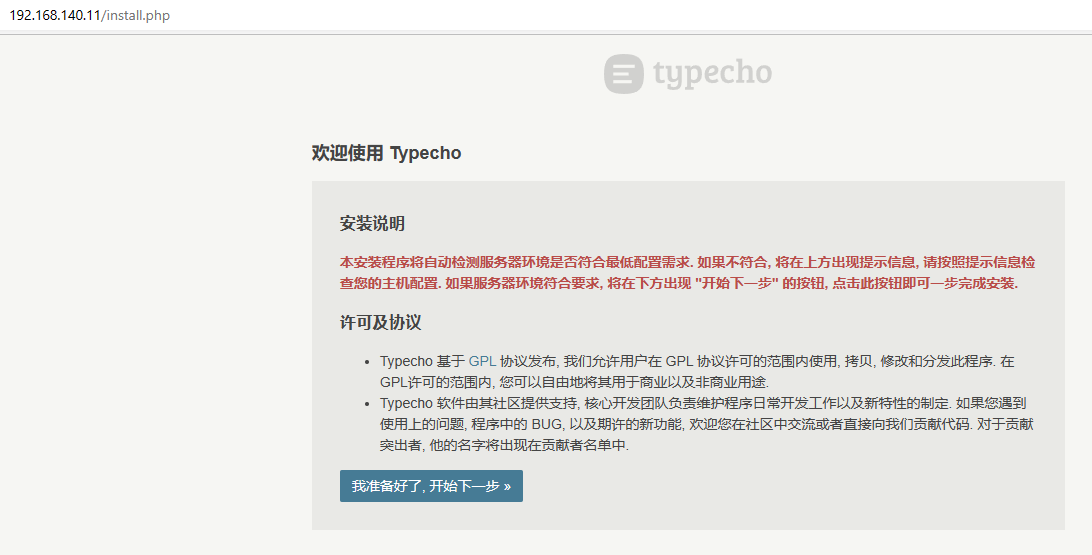
4.测试网页是否工作正常
现在可以提前通过两台
web服务器的IP测试访问了,但是请请不要安装!
五、配置keepalived
分别在
2台webserver配置安装keepalived
1.安装keepalived
[root@webserver01 ~]# yum install -y keepalived
[root@webserver02 ~]# yum install -y keepalived
2.编写高可用脚本
[root@webserver01 ~]# vim /opt/check_nginx.sh
#! /bin/bash

netstat -tunlp | grep "nginx" &> /dev/null

if [ $? -ne 0 ]; then
    systemctl stop keepalived
fi
[root@webserver01 ~]# chmod a+x /opt/check_nginx.sh
拷贝脚本给web02
[root@webserver01 ~]# rsync -av /opt/check_nginx.sh root@192.168.140.11:/opt/
3.编写主keepalived配置文件
[root@webserver01 ~]# vim /etc/keepalived/keepalived.conf

! Configuration File for keepalived

global_defs {
   router_id master_nginx
}

vrrp_script check_nginx {	#引用外部脚本,并且定义名字
    script "/opt/check_nginx.sh"	#外部脚本路径
    interval 1	#每1秒执行一次脚本
}

vrrp_instance VI_1 {
    state MASTER
    interface ens33
    virtual_router_id 51
    priority 100
    advert_int 1
    authentication {
        auth_type PASS
        auth_pass redhat
    }
    virtual_ipaddress {
        192.168.140.100
    }
    track_script {
        check_nginx		#调用外部脚本,名字是我们上面自己起的
    }
}
4.编写备用keepalived配置文件
[root@webserver02 ~]# vim /etc/keepalived/keepalived.conf

! Configuration File for keepalived

global_defs {
   router_id master_nginx
}

vrrp_script check_nginx {	#引用外部脚本,并且定义名字
    script "/opt/check_nginx.sh"	#外部脚本路径
    interval 1	#每1秒执行一次脚本
}

vrrp_instance VI_1 {
    state BACKUP	#模式为备用
    interface ens33
    virtual_router_id 51
    priority 50	#修改权重
    advert_int 1
    authentication {
        auth_type PASS
        auth_pass redhat
    }
    virtual_ipaddress {
        192.168.140.100
    }
    track_script {
        check_nginx		#调用外部脚本,名字是我们上面自己起的
    }
}
5.启用keepalived服务
[root@webserver01 ~]# systemctl enable --now keepalived
[root@webserver02 ~]# systemctl enable --now keepalived
6.查看IP地址
[root@webserver01 ~]# ip addr
1: lo: <LOOPBACK,UP,LOWER_UP> mtu 65536 qdisc noqueue state UNKNOWN group default qlen 1000
    link/loopback 00:00:00:00:00:00 brd 00:00:00:00:00:00
    inet 127.0.0.1/8 scope host lo
       valid_lft forever preferred_lft forever
    inet6 ::1/128 scope host
       valid_lft forever preferred_lft forever
2: ens33: <BROADCAST,MULTICAST,UP,LOWER_UP> mtu 1500 qdisc pfifo_fast state UP group default qlen 1000
    link/ether 00:0c:29:dd:a1:bc brd ff:ff:ff:ff:ff:ff
    inet 192.168.140.10/24 brd 192.168.140.255 scope global noprefixroute ens33
       valid_lft forever preferred_lft forever
    inet 192.168.140.100/32 scope global ens33	#可以看到VIP在主节点上
       valid_lft forever preferred_lft forever

[root@webserver02 ~]# ip addr
1: lo: <LOOPBACK,UP,LOWER_UP> mtu 65536 qdisc noqueue state UNKNOWN group default qlen 1000
    link/loopback 00:00:00:00:00:00 brd 00:00:00:00:00:00
    inet 127.0.0.1/8 scope host lo
       valid_lft forever preferred_lft forever
    inet6 ::1/128 scope host
       valid_lft forever preferred_lft forever
2: ens33: <BROADCAST,MULTICAST,UP,LOWER_UP> mtu 1500 qdisc pfifo_fast state UP group default qlen 1000
    link/ether 00:0c:29:8e:52:77 brd ff:ff:ff:ff:ff:ff
    inet 192.168.140.11/24 brd 192.168.140.255 scope global noprefixroute ens33
       valid_lft forever preferred_lft forever
六、安装配置Typecho
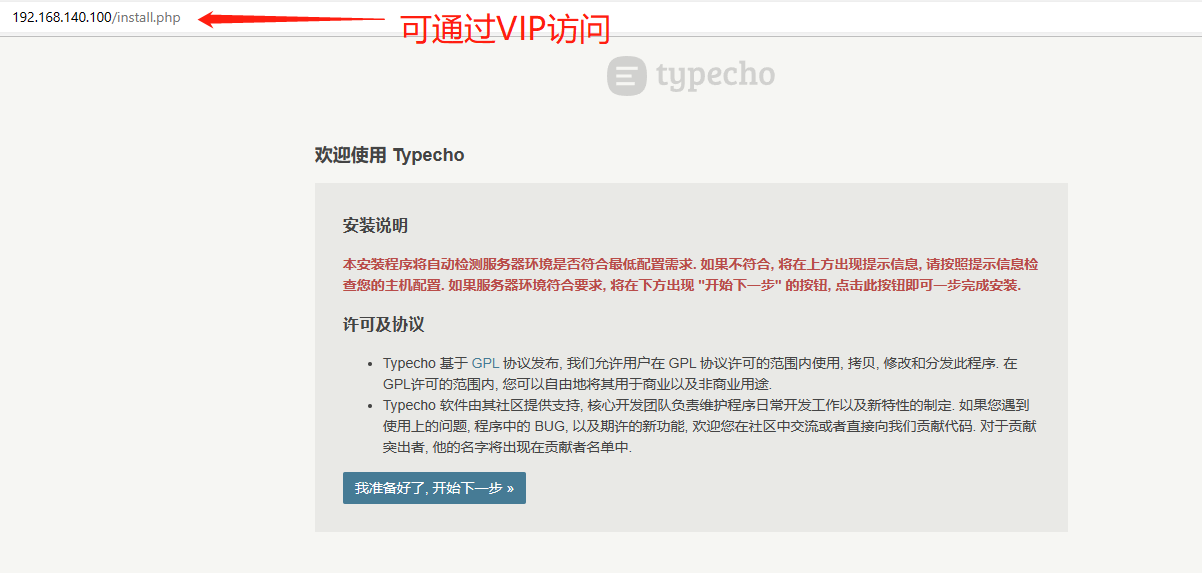
报错解决
如图所示,提示
上传目录无法写入, 请手动将安装目录下的 /usr/uploads 目录的权限设置为可写然后继续升级

修改路径属主和属组即可解决
[root@webserver01 ~]# chown -R nginx.nginx /typecho
[root@webserver02 ~]# chown -R nginx.nginx /typecho
配置数据库连接
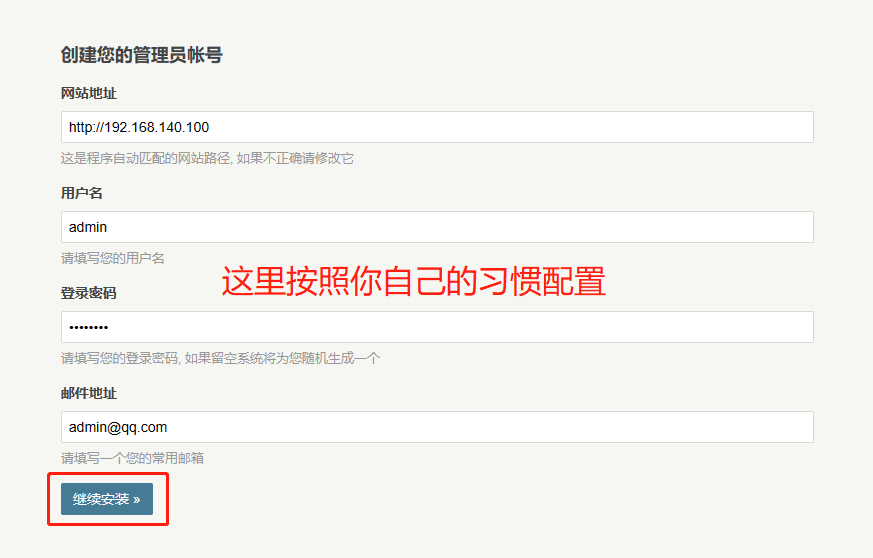
创建后台管理员用户和密码
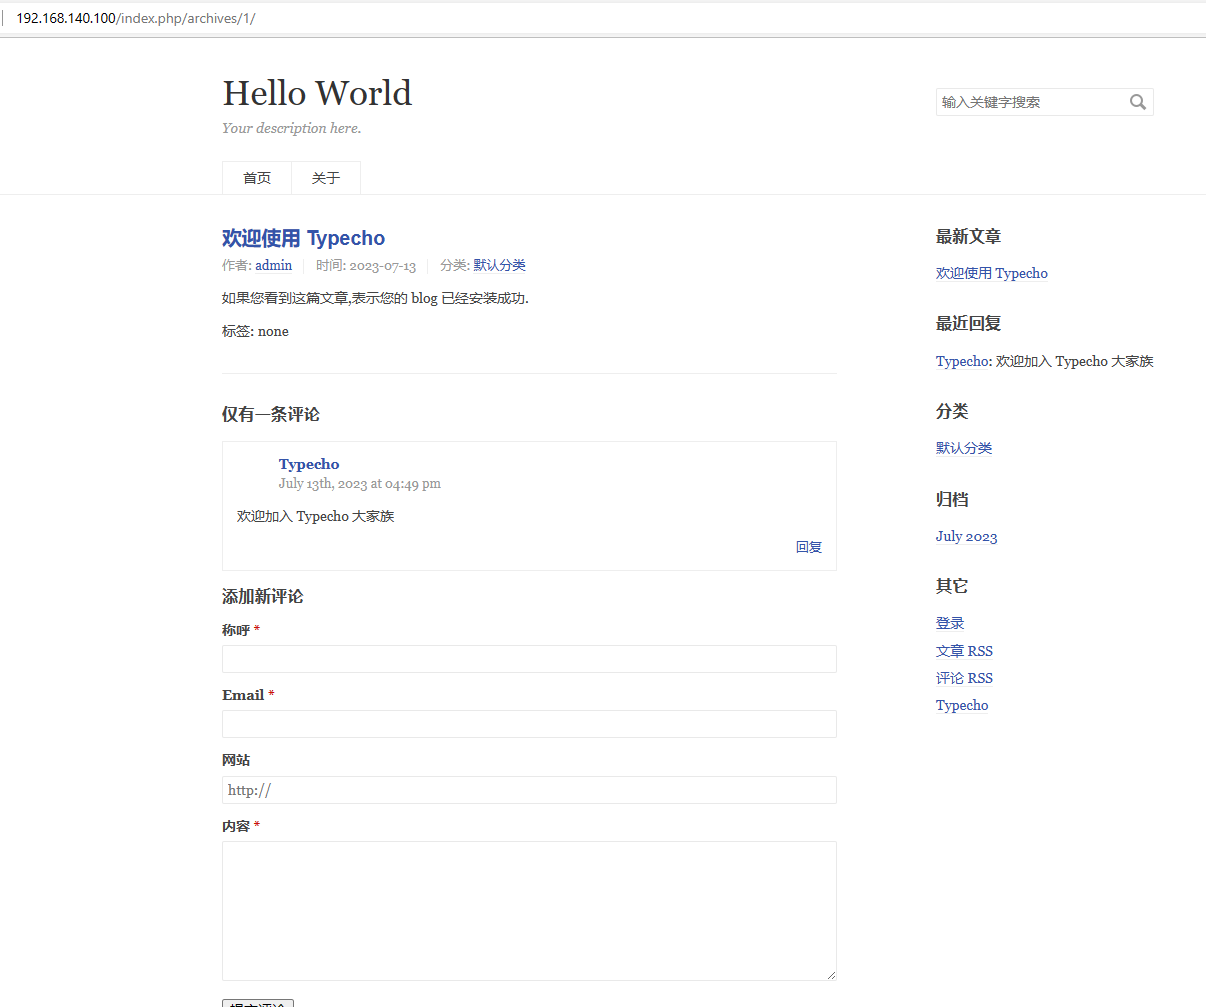
前台访问测试

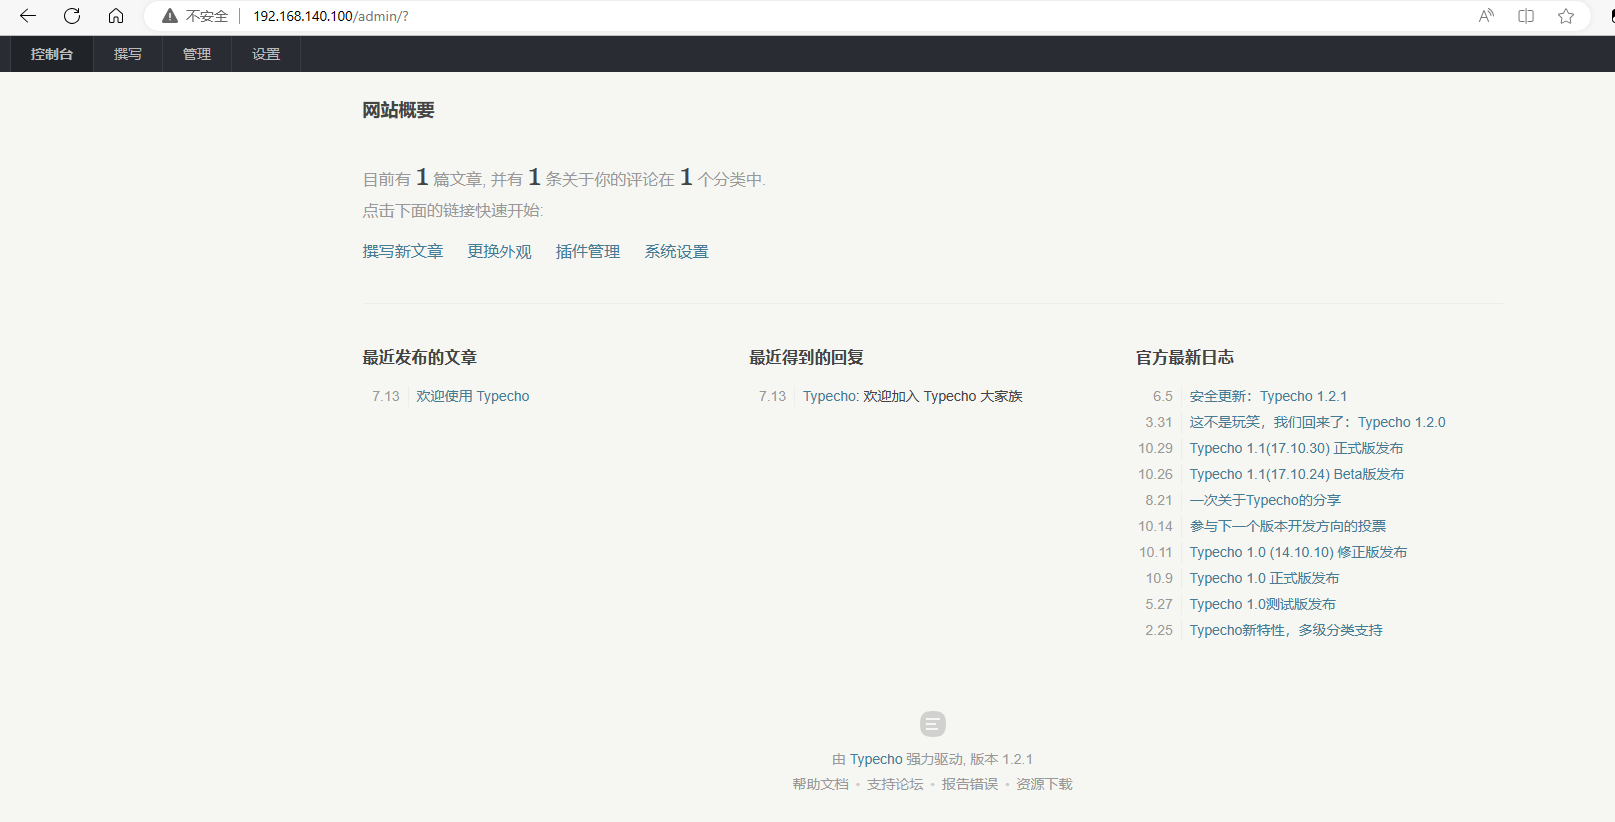
再次进入后台管理界面
站点地址+admin

七、测试keepalived高可用
1.故意停止主服务器的Nginx
[root@webserver01 ~]# nginx -s stop
此时VIP从主服务器上消失,跑到了备用服务器上
[root@webserver01 ~]# ip a
1: lo: <LOOPBACK,UP,LOWER_UP> mtu 65536 qdisc noqueue state UNKNOWN group default qlen 1000
    link/loopback 00:00:00:00:00:00 brd 00:00:00:00:00:00
    inet 127.0.0.1/8 scope host lo
       valid_lft forever preferred_lft forever
    inet6 ::1/128 scope host
       valid_lft forever preferred_lft forever
2: ens33: <BROADCAST,MULTICAST,UP,LOWER_UP> mtu 1500 qdisc pfifo_fast state UP group default qlen 1000
    link/ether 00:0c:29:dd:a1:bc brd ff:ff:ff:ff:ff:ff
    inet 192.168.140.10/24 brd 192.168.140.255 scope global noprefixroute ens33
       valid_lft forever preferred_lft forever

[root@webserver02 ~]# ip a
1: lo: <LOOPBACK,UP,LOWER_UP> mtu 65536 qdisc noqueue state UNKNOWN group default qlen 1000
    link/loopback 00:00:00:00:00:00 brd 00:00:00:00:00:00
    inet 127.0.0.1/8 scope host lo
       valid_lft forever preferred_lft forever
    inet6 ::1/128 scope host
       valid_lft forever preferred_lft forever
2: ens33: <BROADCAST,MULTICAST,UP,LOWER_UP> mtu 1500 qdisc pfifo_fast state UP group default qlen 1000
    link/ether 00:0c:29:8e:52:77 brd ff:ff:ff:ff:ff:ff
    inet 192.168.140.11/24 brd 192.168.140.255 scope global noprefixroute ens33
       valid_lft forever preferred_lft forever
    inet 192.168.140.100/32 scope global ens33	#VIP在备用服务器上
       valid_lft forever preferred_lft forever
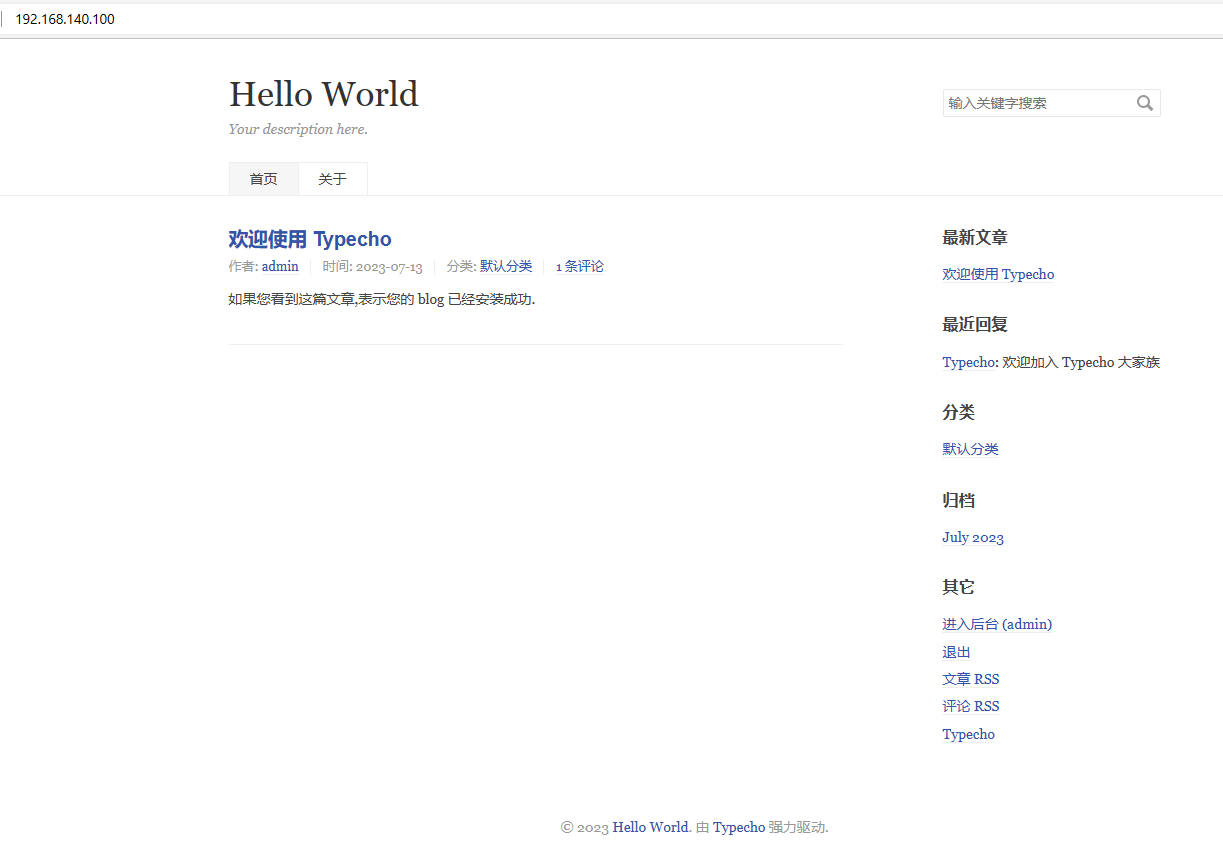
前端测试访问
可以看到正常访问
2.恢复主服务器
[root@webserver01 ~]# nginx
[root@webserver01 ~]# systemctl start keepalived
可以看到VIP又回到的主服务器身上
[root@webserver01 ~]# ip a
1: lo: <LOOPBACK,UP,LOWER_UP> mtu 65536 qdisc noqueue state UNKNOWN group default qlen 1000
    link/loopback 00:00:00:00:00:00 brd 00:00:00:00:00:00
    inet 127.0.0.1/8 scope host lo
       valid_lft forever preferred_lft forever
    inet6 ::1/128 scope host
       valid_lft forever preferred_lft forever
2: ens33: <BROADCAST,MULTICAST,UP,LOWER_UP> mtu 1500 qdisc pfifo_fast state UP group default qlen 1000
    link/ether 00:0c:29:dd:a1:bc brd ff:ff:ff:ff:ff:ff
    inet 192.168.140.10/24 brd 192.168.140.255 scope global noprefixroute ens33
       valid_lft forever preferred_lft forever
    inet 192.168.140.100/32 scope global ens33	#VIP又回来了
       valid_lft forever preferred_lft forever

[root@webserver02 ~]# ip a
1: lo: <LOOPBACK,UP,LOWER_UP> mtu 65536 qdisc noqueue state UNKNOWN group default qlen 1000
    link/loopback 00:00:00:00:00:00 brd 00:00:00:00:00:00
    inet 127.0.0.1/8 scope host lo
       valid_lft forever preferred_lft forever
    inet6 ::1/128 scope host
       valid_lft forever preferred_lft forever
2: ens33: <BROADCAST,MULTICAST,UP,LOWER_UP> mtu 1500 qdisc pfifo_fast state UP group default qlen 1000
    link/ether 00:0c:29:8e:52:77 brd ff:ff:ff:ff:ff:ff
    inet 192.168.140.11/24 brd 192.168.140.255 scope global noprefixroute ens33
       valid_lft forever preferred_lft forever
前端再次测试访问
可以看到前端正常访问,没有受影响
【Linux集群系列教程】高可用Typecho博客搭建教程
https://www.wsjj.top/archives/162
评论