

【Zabbix系列教程】监控MySQL、Nginx、Redis常用键值
关于自定义键值教程:https://www.wsjj.top/archives/110
一、MySQL
1.设置授权用户和密码(用于Zabbix-Server登录数据库收集数据)
A.进入数据库授权用户权限
如果配置了主从复制环境,请在主库操作!
关于MySQL主从复制教程:https://www.wsjj.top/archives/76
关于MySQL用户权限教程:https://www.wsjj.top/archives/73
[root@zabbix-server ~]# mysql -uroot

MariaDB [(none)]> grant all privileges on *.* to 'zabbix'@'localhost' identified by 'redhat';
Query OK, 0 rows affected (0.00 sec)

MariaDB [(none)]> flush privileges;
Query OK, 0 rows affected (0.00 sec)
B.修改配置文件
修改
Agent端上的数据库配置文件
[root@node1 ~]# vim /etc/my.cnf
#在配置文件末尾添加以下内容
[client]
default-character-set=utf8
host=localhost
user='zabbix'
password='redhat'
重启数据库服务
如果您使用的
MySQL,请把mariadb替换成mysqld
[root@node1 ~]# systemctl restart mariadb
测试
直接输入命令会自动登录,但是自动登录的用户是
zabbix哦!
[root@node1 ~]# mysql
Welcome to the MariaDB monitor.  Commands end with ; or \g.
Your MariaDB connection id is 289
Server version: 5.5.68-MariaDB MariaDB Server

Copyright (c) 2000, 2018, Oracle, MariaDB Corporation Ab and others.

Type 'help;' or '\h' for help. Type '\c' to clear the current input statement.

MariaDB [(none)]>
2.修改Zabbix Agent配置文件
A.在配置文件中定义自定义键值
如果您使用的是
Agent2版本,请修改/etc/zabbix/zabbix_agent2.conf
[root@node1 ~]# vim /etc/zabbix/zabbix_agentd.conf
#配置文件并不完整,请勿删改其他
UserParameter=mysql.ping,/usr/bin/mysqladmin ping|grep alive|wc -l	#检查mysql服务是否活动
UserParameter=mysql.user.number,mysql -e "select count(*) from mysql.user" | sed '1d'	#检查mysql用户数量
B.重启服务,让配置文件生效
如果您使用的是
Agent2版本,请使用zabbix-agent2
[root@node1 ~]# systemctl restart zabbix-agent
C.服务器Server端测试
如果提示找不到
zabbix_get命令,请安装yum install -y zabbix-get
[root@zabbix-server ~]# zabbix_get -s 192.168.140.12 -k mysql.ping
1
如果您出现以下报错,请检查
zabbix用户是否对数据库的数据目录拥有权限!
[root@zabbix-server ~]# zabbix_get -s 192.168.140.12 -k mysql.ping
/usr/bin/mysqladmin: connect to server at 'localhost' failed
error: 'Can't connect to local MySQL server through socket '/var/lib/mysql/mysql.sock' (13)'
Check that mysqld is running and that the socket: '/var/lib/mysql/mysql.sock' exists!
0
3.更多关于MySQL的自定义键值
#监控MySQL版本
UserParameter=mysql.version,mysql -V | cut -f6 -d" " | sed 's/,//'
#监控MySQL进程数
UserParameter=mysql.process,ps -ef|grep "mysql"|grep -v "grep"|wc -l
#监控MySQL运行状态
UserParameter=mysql.ping,/usr/bin/mysqladmin ping|grep alive|wc -l
#监控MySQL运行时间
UserParameter=mysql.uptime,/usr/bin/mysqladmin extended-status|grep Uptime|head -1|cut -f3 -d"|"
#监控MySQL的连接数
UserParameter=mysql.Threads.connected,/usr/bin/mysqladmin extended-status|grep Threads_connected|head -1|cut -f3 -d"|"
#监控MySQL活动状态的连接数
UserParameter=mysql.Threads.running,/usr/bin/mysqladmin extended-status|grep Threads_running|head -1|cut -f3 -d"|"
#监控MySQL客户端异常中断的数值
UserParameter=mysql.aborted.clients,/usr/bin/mysqladmin extended-status|grep Aborted_clients|head -1|cut -f3 -d"|"
#监控MySQL主从状态
UserParameter=mysql.Slave.status,/usr/bin/mysqladmin extended-status|grep Slave_runnin | grep -o ON |wc -l
#监控MySQL每秒钟获得的查询量
UserParameter=mysql.questions,/usr/bin/mysqladmin extended-status | grep Questions | head -1 | cut -f3 -d"|"
#监控MySQL从数据文件里取数据的次数
UserParameter=mysql.read.rnd,/usr/bin/mysqladmin extended-status|grep Handler_read_rnd_next|head -1 | cut -f3 -d"|"
#监控MySQL往数据文件里写数据的次数
UserParameter=mysql.write.rnd,/usr/bin/mysqladmin extended-status|grep Handler_write|head -1|cut -f3 -d"|"
#监控MySQL内部COMMIT命令的个数
UserParameter=mysql.commit,/usr/bin/mysqladmin extended-status|grep Handler_commit| head -1 | cut -f3 -d"|"
#监控MySQL请求从一张表中删除行的次数。
UserParameter=mysql.delete,/usr/bin/mysqladmin extended-status|grep Handler_delete| head -1 | cut -f3 -d"|"
#监控MySQL表缓存没有命中的数量
UserParameter=mysql.Opened.tables,/usr/bin/mysqladmin extended-status|grep Opened_tables| head -1 | cut -f3 -d"|"
#监控MySQL没有使用索引查询数量
UserParameter=mysql.slowqueries,/usr/bin/mysqladmin extended-status|grep Slow_queries|cut -f3 -d"|"
#监控MySQL执行全表搜索查询的数量
UserParameter=mysql.select.scan,/usr/bin/mysqladmin extended-status|grep Select_scan|cut -f3 -d"|"
#监控MySQL执行慢查询的数量
UserParameter=mysql.select.slow,/usr/bin/mysqladmin extended-status|grep Slow_queries| head -1 | cut -f3 -d"|"
#监控MySQL数据库产生的死锁
mysql -e "show engine innodb status\G;"
关于MySQL主从复制环境监测
监控IO线程和SQL线程
只有
2个线程状态都为yes的时候返回1,否则都不是yes或者其中一个是yes,都返回0
脚本中的mysql命令并没有指定登录用户,是因为我已经更改了配置文件,默认会登录zabbix用户!
[root@node1 ~]# vim /opt/slave.sh
#! /bin/bash

io=$(mysql  -e "show slave status\G" | awk '/Slave_IO_Running/{print $2}')
sql=$(mysql  -e "show slave status\G" | awk '/Slave_SQL_Running/{print $2}')

if [ $io == Yes ] && [ $sql == Yes ] ; then
    echo 1
else
    echo 0
fi
[root@node1 ~]# chmod a+x /opt/slave.sh
[root@node1 ~]# vim /etc/zabbix/zabbix_agentd.conf
UserParameter=mysql.slave,bash /opt/slave.sh
[root@node1 ~]# systemctl restart zabbix-agent
测试
[root@zabbix-server ~]# zabbix_get -s 192.168.140.12 -k mysql.slave
1
监控主从复制同步状态
脚本中的
mysql命令并没有指定登录用户,是因为我已经更改了配置文件,默认会登录zabbix用户!
[root@node1 ~]# vim /opt/pos.sh
#! /bin/bash

read_pos=$(mysql -e "show slave status\G" | awk '/Read_Master_Log_Pos/{print $2}')
exec_pos=$(mysql -e "show slave status\G" | awk '/Exec_Master_Log_Pos/{print $2}')

if [ $read_pos -eq $exec_pos ]; then
    echo 1
else
    echo 0
fi
[root@node1 ~]# chmod a+x /opt/pos.sh
[root@node1 ~]# vim /etc/zabbix/zabbix_agentd.conf
UserParameter=mysql.pos,bash /opt/pos.sh
[root@node1 ~]# systemctl restart zabbix-agent
测试
[root@zabbix-server ~]# zabbix_get -s 192.168.140.12 -k mysql.pos
1
4.拿到以上的自定义键值,就可以去添加监控项和触发器了
关于
Zabbix监控项教程:https://www.wsjj.top/archives/110
关于Zabbix触发器和报警器的教程:https://www.wsjj.top/archives/111
二、Nginx
1.安装Nginx
过程省略
Nginx部署教程:https://www.wsjj.top/archives/83
2.配置Nginx的状态页面
[root@node1 ~]# vim /etc/nginx/conf.d/status.conf
server {
        listen 80;
        server_name localhost;
        location /status {
                stub_status     on;
                access_log      on;
                }
}
监测配置文件
[root@node1 ~]# nginx -t
nginx: the configuration file /etc/nginx/nginx.conf syntax is ok
nginx: configuration file /etc/nginx/nginx.conf test is successful
重新加载配置文件
[root@node1 ~]# nginx -s reload
浏览器访问测试
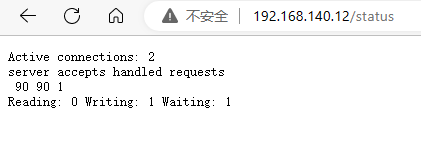
3.修改Agent配置文件
Nginx的活跃连接数
[root@node1 ~]# vim /etc/zabbix/zabbix_agentd.conf
UserParameter=nginx.active.connect,curl -s http://192.168.140.12/status 2>/dev/null | awk '/^Active connections/{print $NF}'
重启服务,让配置文件生效
[root@node1 ~]# systemctl restart zabbix-agent
Server端测试
[root@zabbix-server ~]# zabbix_get -s 192.168.140.12 -k nginx.active.connect
3
4.更多自定义键值
#监控Nginx活动连接数
UserParameter=Nginx.Active.Connections,/usr/bin/curl -s http://127.0.0.1/status 2>/dev/null |grep 'Active connections:'|awk '{print $NF}'
#监控Nginx处理连接总数
UserParameter=Nginx.Accepts.Connections,/usr/bin/curl -s http://127.0.0.1/status 2>/dev/null|sed -n '3p'|awk '{print $1}'
#监控Nginx处理连接失败数
UserParameter=Nginx.Handled.Connections,/usr/bin/curl -s http://127.0.0.1/status 2>/dev/null|sed -n '3p'|awk '{print $2}'
#监控Nginx处理请求总数
UserParameter=Nginx.requests.Connections,/usr/bin/curl -s http://127.0.0.1/status 2>/dev/null|sed -n '3p'|awk '{print $3}'
#Nginx读取到客户端的Header信息数
UserParameter=Nginx.Reading,/usr/bin/curl -s http://127.0.0.1/status 2>/dev/null|sed -n '4p'|awk '{print $2}'
#Nginx返回给客户端的Header信息数
UserParameter=Nginx.Writing,/usr/bin/curl -s http://127.0.0.1/status 2>/dev/null|sed -n '4p'|awk '{print $4}'
#Nginx处理完并等候状态的驻留连接
UserParameter=Nginx.Waiting,/usr/bin/curl -s http://127.0.0.1/status 2>/dev/null|sed -n '4p'|awk '{print $6}'
5.Zabbix监控Nginx日志
我们都知道web服务,都会有个访问日志,这个日志文件主要记录着客户端访问时候的设备,以及访问路径,设备信息,和各种服务器响应的状态码
A.查看Nginx日志
如果是
yum安装的Nginx,默认日志存放目录/var/log/nginx/*.log
[root@node1 ~]# cat /var/log/nginx/access.log
192.168.140.1 - - [11/May/2023:10:55:47 +0800] "GET /favicon.ico HTTP/1.1" 404 555 "http://192.168.140.12/status" "Mozilla/5.0 (Windows NT 10.0; Win64; x64) AppleWebKit/537.36 (KHTML, like Gecko) Chrome/113.0.0.0 Safari/537.36 Edg/113.0.1774.35" "-"
B.查看Nginx配置文件中的日志记录格式
这里是
yum安装Nginx的日志记录格式
[root@node1 ~]# vim /etc/nginx/nginx.conf
log_format  main  '$remote_addr - $remote_user [$time_local] "$request" '
                      '$status $body_bytes_sent "$http_referer" '
                      '"$http_user_agent" "$http_x_forwarded_for"';
C.编写脚本
[root@node1 ~]# vim /opt/nginx_logs.sh

#!/bin/bash

status_code=$1
count=$(awk -v status="$status_code" '$9 == status {print $0}' /var/log/nginx/access.log | wc -l)

echo "$count"
D.给予执行权限
[root@node1 ~]# chmod a+x /opt/nginx_logs.sh
E.测试脚本
[root@node1 ~]# bash /opt/nginx_logs.sh 304
13
[root@node1 ~]# bash /opt/nginx_logs.sh 200
4
[root@node1 ~]# bash /opt/nginx_logs.sh 404
3
F.修改Agent配置文件
[root@node1 ~]# vim /etc/zabbix/zabbix_agentd.conf
UserParameter=nginx.status.code[*],bash /opt/nginx_logs.sh $1
重启服务
[root@node1 ~]# systemctl restart zabbix-agent
G.Server端测试
[root@zabbix-server ~]# zabbix_get -s 192.168.140.12 -k nginx.status.code[200]
4
[root@zabbix-server ~]# zabbix_get -s 192.168.140.12 -k nginx.status.code[404]
3
[root@zabbix-server ~]# zabbix_get -s 192.168.140.12 -k nginx.status.code[304]
13
三、Redis
1.安装Redis
如果使用
yum安装,请配置epel源
更多关于Redis安装的教程:https://www.wsjj.top/archives/91
更多关于Redis配置文件教程:https://www.wsjj.top/archives/92
[root@node1 ~]# yum install -y redis
启动服务
#开启后台启动
[root@node1 ~]# vim /etc/redis.conf
daemonize yes
[root@node1 ~]# redis-server /etc/redis.conf
2.查看redis详细信息
[root@node1 ~]# redis-cli info
# Server
redis_version:3.2.12
redis_git_sha1:00000000
redis_git_dirty:0
redis_build_id:7897e7d0e13773f
redis_mode:standalone
os:Linux 3.10.0-1160.el7.x86_64 x86_64
arch_bits:64
multiplexing_api:epoll
gcc_version:4.8.5
process_id:39324
run_id:d6b9d2066c503d9d6f5acab61e429da46af11c34
tcp_port:6379
uptime_in_seconds:24
uptime_in_days:0
hz:10
lru_clock:6053975
executable:/root/redis-server
config_file:/etc/redis.conf

# Clients
connected_clients:1
client_longest_output_list:0
client_biggest_input_buf:0
blocked_clients:0

# Memory
used_memory:813408
used_memory_human:794.34K
used_memory_rss:5308416
used_memory_rss_human:5.06M
used_memory_peak:813408
used_memory_peak_human:794.34K
total_system_memory:1907712000
total_system_memory_human:1.78G
used_memory_lua:37888
used_memory_lua_human:37.00K
maxmemory:0
maxmemory_human:0B
maxmemory_policy:noeviction
mem_fragmentation_ratio:6.53
mem_allocator:jemalloc-3.6.0

# Persistence
loading:0
rdb_changes_since_last_save:0
rdb_bgsave_in_progress:0
rdb_last_save_time:1683775551
rdb_last_bgsave_status:ok
rdb_last_bgsave_time_sec:-1
rdb_current_bgsave_time_sec:-1
aof_enabled:0
aof_rewrite_in_progress:0
aof_rewrite_scheduled:0
aof_last_rewrite_time_sec:-1
aof_current_rewrite_time_sec:-1
aof_last_bgrewrite_status:ok
aof_last_write_status:ok

# Stats
total_connections_received:1
total_commands_processed:0
instantaneous_ops_per_sec:0
total_net_input_bytes:14
total_net_output_bytes:0
instantaneous_input_kbps:0.00
instantaneous_output_kbps:0.00
rejected_connections:0
sync_full:0
sync_partial_ok:0
sync_partial_err:0
expired_keys:0
evicted_keys:0
keyspace_hits:0
keyspace_misses:0
pubsub_channels:0
pubsub_patterns:0
latest_fork_usec:0
migrate_cached_sockets:0

# Replication
role:master
connected_slaves:0
master_repl_offset:0
repl_backlog_active:0
repl_backlog_size:1048576
repl_backlog_first_byte_offset:0
repl_backlog_histlen:0

# CPU
used_cpu_sys:0.00
used_cpu_user:0.02
used_cpu_sys_children:0.00
used_cpu_user_children:0.00

# Cluster
cluster_enabled:0

# Keyspace
3.编写脚本
shell脚本中$1是一个特殊变量,会传递执行脚本的第一个参数,我们把这个参数交给awk命令执行,为了防止出现多条数据,我们只取第一行,也就是说,今后我们携带的参数不能是模糊类型的
[root@node1 ~]# vim /opt/redis.sh
#!/bin/bash

option=$(redis-cli info | awk -v pattern="$1" -F: '$0 ~ pattern{print $NF}' | head -n1)

echo $option
给予权限
[root@node1 ~]# chmod a+x /opt/redis.sh
测试脚本
[root@node1 ~]# bash /opt/redis.sh used_cpu_sys
3.61
[root@node1 ~]# bash /opt/redis.sh used_memory
812384
4.修改Agent端配置文件
这里的$1不要和脚本中的特殊变量搞混,这里的$1是zabbix中的特殊变量,主要传递前面[*]中的第一个参数,详细示例请看下面的测试
今后我们定义的这个键值,必须携带参数,否则无法使用哦!
[root@node1 ~]# vim /etc/zabbix/zabbix_agentd.conf
UserParameter=redis.info[*],bash /opt/redis.sh $1
重启服务
[root@node1 ~]# systemctl restart zabbix-agent
Server端测试
需要安装
zabbix-get
[root@zabbix-server ~]# zabbix_get -s 192.168.140.12 -k redis.info[redis_version]
3.2.12
[root@zabbix-server ~]# zabbix_get -s 192.168.140.12 -k redis.info[used_cpu_sys]
3.84
[root@zabbix-server ~]# zabbix_get -s 192.168.140.12 -k redis.info[used_memory]
812384
[root@zabbix-server ~]# zabbix_get -s 192.168.140.12 -k redis.info[tcp_port]
6379
更多参数,请参考redis-cli info中的信息
[root@node1 ~]# redis-cli info
# Server
redis_version:3.2.12
redis_git_sha1:00000000
redis_git_dirty:0
redis_build_id:7897e7d0e13773f
redis_mode:standalone
os:Linux 3.10.0-1160.el7.x86_64 x86_64
arch_bits:64
multiplexing_api:epoll
gcc_version:4.8.5
process_id:39324
run_id:d6b9d2066c503d9d6f5acab61e429da46af11c34
tcp_port:6379
uptime_in_seconds:8851
uptime_in_days:0
hz:10
lru_clock:6062802
executable:/root/redis-server
config_file:/etc/redis.conf

# Clients
connected_clients:1
client_longest_output_list:0
client_biggest_input_buf:0
blocked_clients:0

# Memory
used_memory:812384
used_memory_human:793.34K
used_memory_rss:5308416
used_memory_rss_human:5.06M
used_memory_peak:813408
used_memory_peak_human:794.34K
total_system_memory:1907712000
total_system_memory_human:1.78G
used_memory_lua:37888
used_memory_lua_human:37.00K
maxmemory:0
maxmemory_human:0B
maxmemory_policy:noeviction
mem_fragmentation_ratio:6.53
mem_allocator:jemalloc-3.6.0

# Persistence
loading:0
rdb_changes_since_last_save:0
rdb_bgsave_in_progress:0
rdb_last_save_time:1683775551
rdb_last_bgsave_status:ok
rdb_last_bgsave_time_sec:-1
rdb_current_bgsave_time_sec:-1
aof_enabled:0
aof_rewrite_in_progress:0
aof_rewrite_scheduled:0
aof_last_rewrite_time_sec:-1
aof_current_rewrite_time_sec:-1
aof_last_bgrewrite_status:ok
aof_last_write_status:ok

# Stats
total_connections_received:37
total_commands_processed:36
instantaneous_ops_per_sec:0
total_net_input_bytes:518
total_net_output_bytes:76887
instantaneous_input_kbps:0.00
instantaneous_output_kbps:0.00
rejected_connections:0
sync_full:0
sync_partial_ok:0
sync_partial_err:0
expired_keys:0
evicted_keys:0
keyspace_hits:0
keyspace_misses:0
pubsub_channels:0
pubsub_patterns:0
latest_fork_usec:0
migrate_cached_sockets:0

# Replication
role:master
connected_slaves:0
master_repl_offset:0
repl_backlog_active:0
repl_backlog_size:1048576
repl_backlog_first_byte_offset:0
repl_backlog_histlen:0

# CPU
used_cpu_sys:3.91
used_cpu_user:2.00
used_cpu_sys_children:0.00
used_cpu_user_children:0.00

# Cluster
cluster_enabled:0

# Keyspace
【Zabbix系列教程】监控MySQL、Nginx、Redis常用键值
https://www.wsjj.top/archives/112
评论