
Centos7安装并配置Zabbix Agent端
本教程为Centos7安装并配置Zabbix Server端后续教程,如果您还没有搭建,请看第一期教程
本教程需要第二台虚拟机配置agent端,请自行准备!
第一期教程:Centos7安装并配置Zabbix Server端
第三期教程:Centos7安装并配置Zabbix Proxy端
一、关闭防火墙和selinux(第二台虚拟机)
1.关闭防火墙并且设置开机不自启
systemctl stop firewalld && systemctl disable firewalld
2.关闭selinux
setenforce 0
sed -i 's/SELINUX=enforcing/SELINUX=disabled/' /etc/selinux/config
3.重启
reboot
二、设置阿里源
请提前启动网卡!
查看网卡信息和ip地址
ip addr
列:网卡名字是ens33
启动网卡
ifup ens33
yum源
wget -O /etc/yum.repos.d/CentOS-Base.repo http://mirrors.aliyun.com/repo/Centos-7.repo
epel源
wget -O /etc/yum.repos.d/epel.repo https://mirrors.aliyun.com/repo/epel-7.repo
三、安装并且配置zabbix
1.安装zabbix rpm源(官方源)
rpm -Uvh https://repo.zabbix.com/zabbix/5.0/rhel/7/x86_64/zabbix-release-5.0-1.el7.noarch.rpm
安装zabbix rpm源(阿里源)【上面下载慢用这个】
rpm -Uvh https://mirrors.aliyun.com/zabbix/zabbix/5.0/rhel/7/x86_64/zabbix-release-5.0-1.el7.noarch.rpm
2.清理yum源缓存
yum clean all && yum makecache fast
3.安装zabbix agent2
yum install -y zabbix-agent2.x86_64
4.修改配置文件/etc/zabbix/zabbix_agent2.conf
vim /etc/zabbix/zabbix_agent2.conf
请自行找到并更改以下字段
Server=127.0.0.1		#把127.0.0.1改成服务器IP [server端]
ServerActive=127.0.0.1		#把127.0.0.1改成服务器IP [server端]
Hostname=zabbix server		#把zabbix server改成本机IP
UnsafeUserParameters=0		#把0改成1
5.重启并设置开机自启
systemctl restart zabbix-agent2.service
systemctl enable zabbix-agent2.service
四、在server端添加并且监控agent端
打开浏览器访问服务器地址(ip+/zabbix)
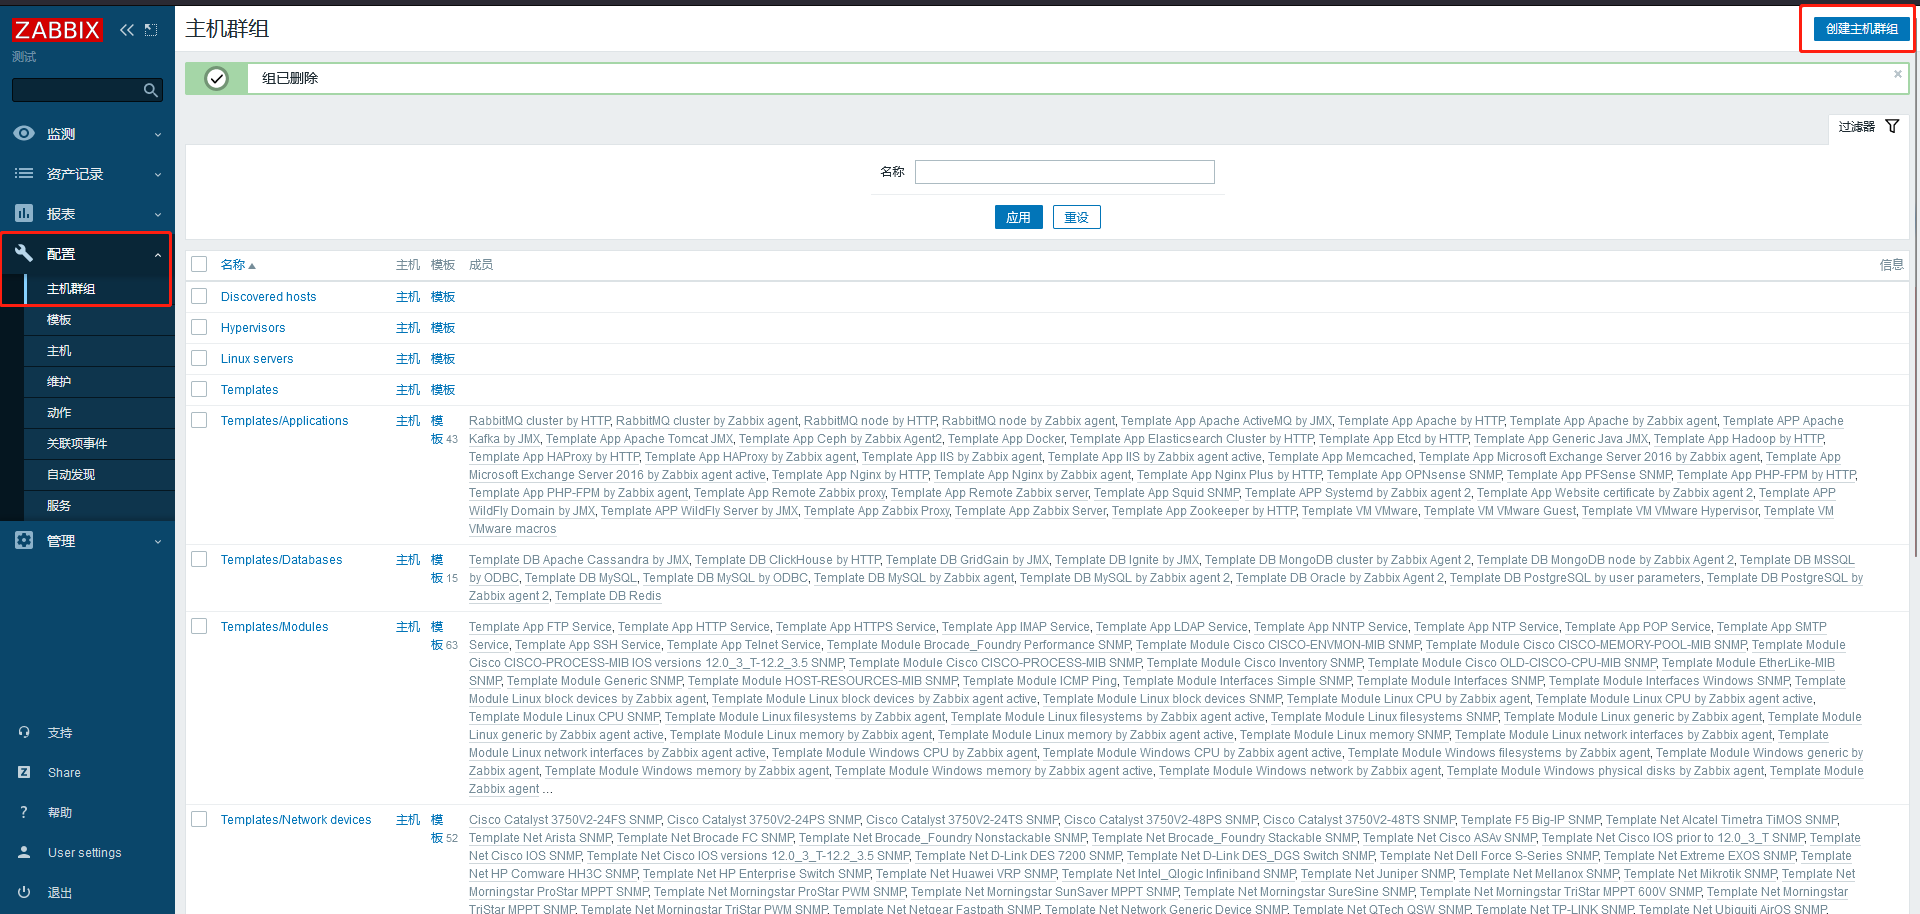
1.添加主机组

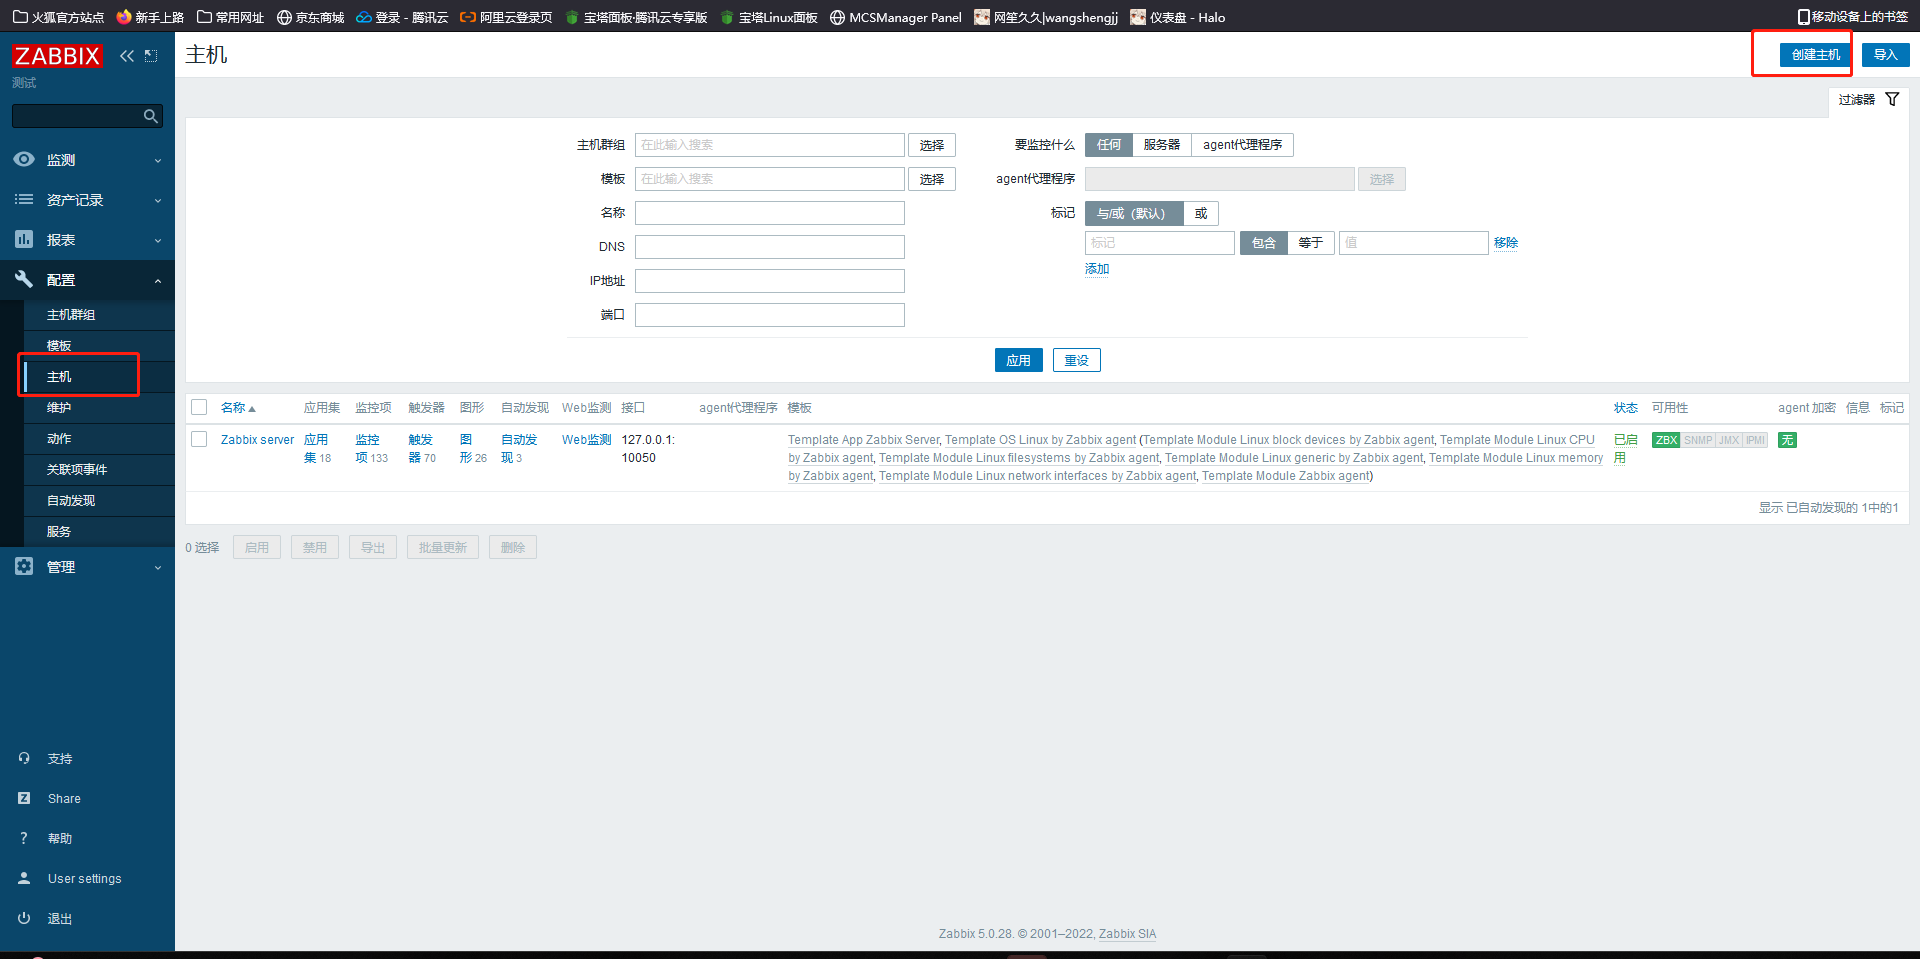
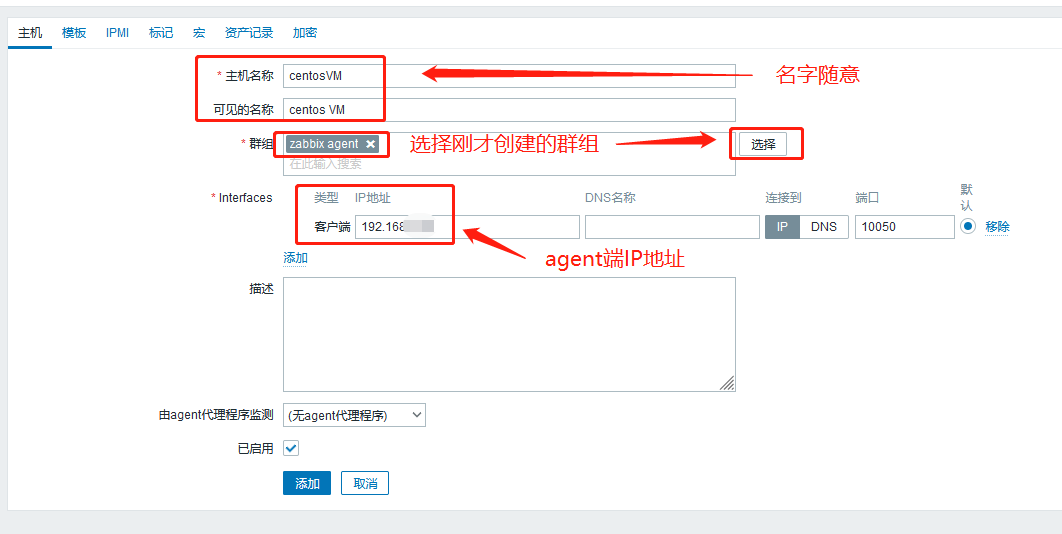
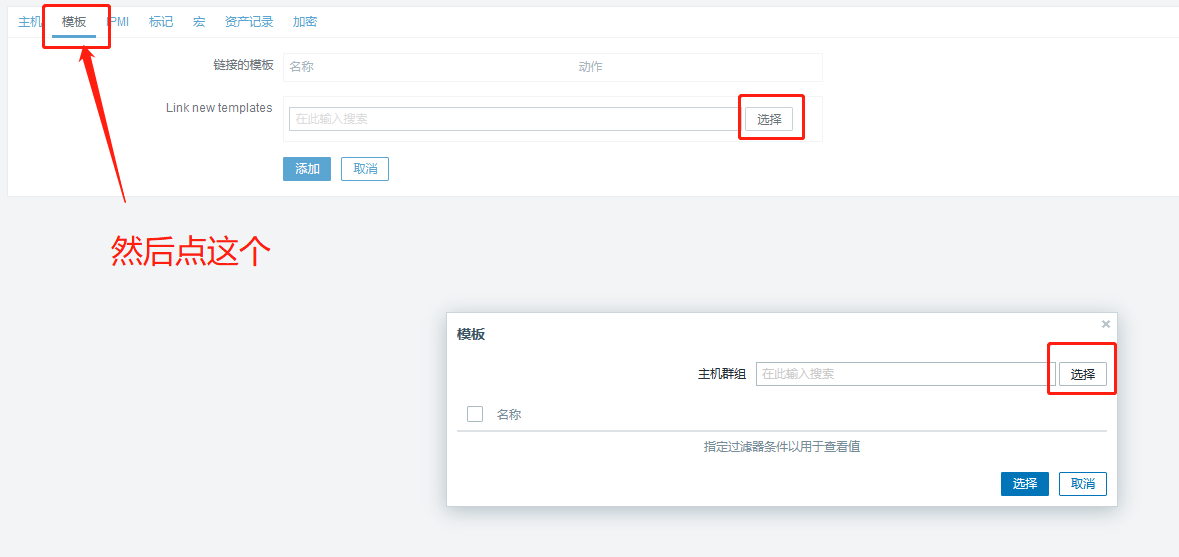
2.添加主机(想监控其他请自行更改参数)
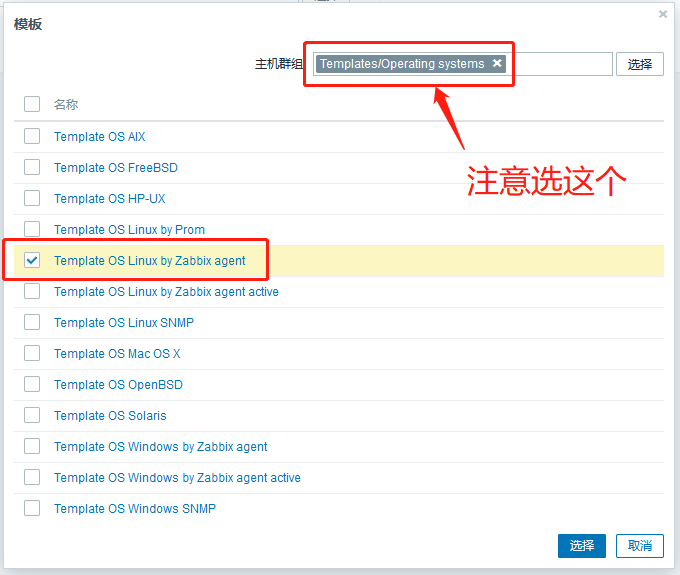
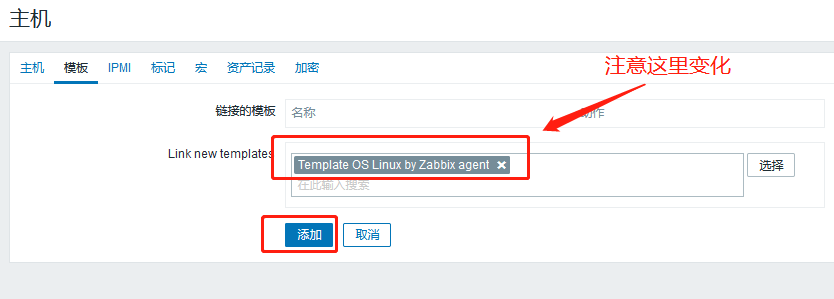
以上即可完成添加
3.查看添加的agent端

只要那个图标亮了,就证明我们配置没有问题
感谢观看!
教程未完结,等待更新…
Centos7安装并配置Zabbix Agent端
https://www.wsjj.top/archives/19
评论